Showing posts with label Picnic. Show all posts

Monday, September 5, 2022

Corn Salad, Elote Style for End of Summer Feasts

Today's Labor Day, tomorrow it's back to work after a wonderful vacation-work trip to The Netherlands and Berlin. Last night we had our annual dinner with friends at Back On The Beach (445 Pacific Coast Hwy, AKA Palisades Beach Road, Santa Monica CA 90402). Today is the last dinner service at Back On The Beach so we were happy to enjoy a meal and the sunset.

We're joining a potluck dinner tonight at our neighbors around the corner. We're looking forward to catching up and hanging out. We're bringing homemade pickles and my version of an elote salad. I'm reprising the post I wrote after a trip to Mexico.  Enjoy!

Mexican street food 

Travel in Mexico and you'll encounter street vendors selling a great number of delicious food snacks. Elote is one of the best. An ear of corn is grilled, dusted with dry cheese, slavered with mayonnaise and seasoned with chili powder and fresh lime juice. The ear of corn is always served whole, sometimes resting in a paper dish or with a stick in the bottom like a corndog.


Elote is delicious but messy to eat. A whole ear of corn takes two hands to manage. And, with each bite, the finely grated Cotija cheese floats into the air, landing on clothing.

Deconstructing elote

Cutting the kernels off the cobs makes the seasoned corn easier to enjoy. In Mexico there is a corn kernel snack called esquires, which employs some of the elote seasonings. The recipe I settled on uses olive oil instead of mayonnaise. That way the salad can be served as a light entrée topped with a protein or as a side dish accompanying grilled vegetables, meats, poultry and fish. A perfect summer recipe.


The best way to cook corn on the cob is a topic of heated debate. There are those who will only boil corn, others who will only grill it. I have seen elote prepared using both. My preference is to strip off the husk and grill the ear so that some of the kernels are charred, adding caramelized sweetness to the salad.

Just the right cheese

What gives elote its distinctive flavor is the combination of spicy chili powder, fresh lime juice and Mexican Cotija cheese. 

Powdery when finely grated, Cotija cheese is salty so you may not need to add salt when you make the corn salad. Often described as having qualities similar to feta and Parmesan, Cotija tastes quite different.


Mexican Corn Salad

Adding finely chopped Italian parsley to the seasoned corn kernels brightens the flavors. Cilantro can be used instead of parsley to give the salad a peppery flavor.

The corn can be prepared ahead and kept in the refrigerator overnight. In which case, do not add the Cotija cheese or parsley until just before serving.

To create a colorful salad, just before serving, toss the seasoned corn and parsley with quartered cherry tomatoes, cut-up avocados and butter lettuce or romaine leaves.

After tossing, taste the salad and adjust the amount of Cotija cheese and chili powder and, if needed sea salt.

Prep time: 10 minutes

Cook time: 15 to 20 minutes

Total time: 25 to 30 minutes

Yield: 4 entrée servings or 8 side dish servings

Ingredients

4 tablespoons olive oil, divided

1/2 teaspoon sea salt 

1/4 teaspoon freshly ground black pepper

4 large ears of corn, husks and silks removed, washed, dried

1/2 cup finely grated Cotija cheese

1/2 teaspoon chili powder

Directions

1. Preheat an indoor grill or outdoor barbecue to hot.

2. Pour 2 tablespoons olive oil into a flat pan and season with sea salt and black pepper.

3. Roll the ears of corn in the seasoned olive oil to coat all sides.

4. Using tongs, place the corn on the grill, turning every 2 to 3 minutes so that some of the kernels char, being careful not to burn the ears.

5. After the corn is cooked on all sides, remove and let cool in the flat pan with the seasoned olive oil.

6. To cut the kernels off the cob, use a sharp chef's knife. Hold each ear of corn over the pan with the seasoned oil and slice the kernels off the cob.


7. Transfer the kernels and the remaining seasoned oil into a large mixing bowl.

8. Add Cotija cheese, chili powder and parsley. Toss well.


9. Drizzle the remaining olive oil over the salad and toss.


10. Serve at room temperature with lime wedges on the side.

Thursday, July 1, 2021

Fourth of July is Back! Time to Picnic. Time to Pickle

Rockets exploding overhead. Sparklers in the darkness. Time to celebrate Independence Day. Time to gather together.

Last year we couldn't. This year we can. An amazing triumph of human will and science over a deadly disease. Thank you to all those who labored to care for us and those who created a way forward.

This year for us in Pacific Palisades, we will celebrate the past and our future with a picnic on the grass facing the high school. We'll have a pot luck dinner, see one another in person and catch up.

I'll make fried chicken a chef taught me in his kitchen and potato salad I learned from my mother. And, I will bring pickles made not with cukes but with elegantly long Persian cucumbers. For me, this is a newly modified recipe, midway between a classic Jewish dill pickle and Moroccan pickled vegetables.


Ready to eat after a day for a crisp pickle or in a week or two for a more mellow pickle-experience.

Pickles

No doubt the people who made the first pickles thought they had made a mistake. Somebody accidentally forgot about some raw vegetables in a pot with an acid and salt. Surprise, surprise. A week later, the vegetables weren’t moldy, no bugs had eaten them and, deliciously, they had a nice crunch and tang. Thus was born, the pickle!

In the 1920s, my great-grandfather made pickles on the Lower East Side of Manhattan. Grandmother Caroline used to tell stories about working in their little grocery store as a child. When customers would want pickles, she would hop off the counter and go out front to the pickle barrels and fish out the ones they wanted.

I never knew her parents. I never ate their pickles, but I must have brine in my veins because wherever I travel, I am always on the look out for pickles.

Persian Cucumber, Carrot, Onion and Daikon Pickles

As with with things in life, the better the ingredients, the better the result. Use the best vegetables, you'll make a better pickle. Choose Persian cucumbers that are firm, unblemished, without any soft areas. Use carrots that have a sweet taste, the better to contrast with the vinegar and salt. 

For pickled onions, slice yellow onions the long way (from root to stem) into thin strips or buy Mexican onions that look like mature scallions with fat bulbs. Whole onions take a week to pickle. Onion strips pickle in a day.

Daikon pickles are a delight. Crisp and clean tasting.

Vinegar makes a difference. White, red, yellow, there are many different types of vinegars with as many results. I use white wine vinegar I find in Persian and Armenian grocery stores that is less acidic than white vinegar and doesn't color the vegetables as would red wine vinegar. For these pickles I don't use Japanese rice wine vinegar, but I think it would work as well.

Choose a glass jar tall enough for the Persian cucumbers to stand up. Wash the glass jar in a dish washer or with hot water and soap before using.

How much brine you need depends on the size of the jar. All the vegetables must be submerged in brine to avoid spoiling. Make extra brine to keep in a separate container. As vegetables are removed, add brine to cover. 

Only use Diamond Crystal Kosher Salt. Other kosher salts contain additives.

Before adding the brine to the vegetables, taste and adjust. You might like less salt or more vinegar than I do. 

Prep: 15 minutes

Serves: 6

Pickling Ingredients:

6 Persian cucumbers, washed, stems removed

2 large carrots, washed, ends trimmed, peeled, cut into 1 1/2" fat sticks

1 small daikon, washed, ends trimmed, peeled, cut into 1 1/2" fat sticks

1 small yellow onions, washed, ends trimmed, peeled, sliced thin from stem to root

Brine Ingredients - Adjust proportionally to the size of the glass jar

1 1/2 tablespoons Diamond Crystal Kosher Salt 

1/2 cup Yellow White Wine Persian Vinegar or Japanese Rice Wine Vinegar

2 cups water

1 teaspoon black pepper corns

1/2 teaspoon mustard seeds

A pinch hot pepper flakes

3 bay leaves

Directions:

Lay the glass jar on its side. 

Slide cucumbers into jar so they will stand up when the jar is placed upright. 

Add other vegetables.

Add aromatics.

Stir brine well and add until vegetables are completely submerged. Make certain you keep 1 cup of brine in a separate container to add later as the liquid level drops when you remove vegetables.


Friday, May 22, 2020

Slow Roasted Brown Sugar Pork Ribs for Memorial Day, 4th of July, Labor Day or Any Day Delicious

Stafer-at-home means being careful but it doesn't mean we can't enjoy a great summertime feast. Memorial Day, Fourth of July, Labor Day and any day, we can enjoy a meal and celebrate life even during a pandemic.

For me, that means making pork ribs.

My mother taught me to make pork ribs with a thick coating of sauce sweetened with brown sugar and raisins. Eating those finger-licking ribs was one of my favorite childhood memories.
Everything changed on a busy research trip to Abilene and Fort Worth, when I ate at 25 restaurants in 36 hours. I fell in love with West Texas BBQ.
At restaurant after restaurant, I watched grill masters lay bundles of mesquite into their subcompact-car-sized smokers. With the heavy metal doors open, the wood crackled as flames enveloped the logs The grill masters seasoned their racks of pork ribs with thick, grainy coats of brown sugar and spices rubbed onto the meat.  Waves of dry heat radiated from the smokers. But the heat that would cook these ribs would come not from an open fire but from smoldering mesquite embers.
When the doors were closed, the blazing logs were starved of oxygen. The flames died and a delicate smoke filled the air. At that moment the grill masters loaded in the racks of ribs coated with sweetened dry rub. Hours later, the ribs were removed, their outer coating thickened to crispness, creating what grill masters call “bark.”
I loved those ribs even more than the ones from my childhood.
At home, without the benefit of a smoker, I experimented for years to duplicate that sweet-crispness. Nothing could ever recreate the wonderful mesquite smokiness but I did succeed in making ribs with bark as good as any I enjoyed in West Texas.

High heat versus slow cooking

Mix of kosher salt, black pepper, brown sugar, cumin, coriander and cayenne for dry rub slow roasted pork ribs. Credit: Copyright 2016 David Latt

Mix of kosher salt, black pepper, brown sugar, cumin, coriander and cayenne for dry rub slow roasted pork ribs. Credit: Copyright 2016 David Latt

Cooking with high heat is exciting. There is great pleasure in watching the pyrotechnics of an outdoor grill as sizzling fat catches fire.  Roasting at low heat in the oven lacks that excitement.
And yet, what happens in an oven set at 250 F has its own kind of magic. In the darkness of the oven, the waves of steady heat melt the fat inside the rack, tenderizing the meat and gently fusing the dry rub to the outside of the ribs.
The best magic of all is that the oven does the work. No standing over a blazingly hot grill on a hot day. Once the oven door closes, there is nothing to be done.
Walk into the kitchen and a savory-sweet aroma scents the air. Pull the baking tray out of the oven and press a finger against the outside of the rack. The soft pliancy of the meat has been replaced by a jerky-like crust as sweet as a crème brulee topping.

Slow-Roasted, Dry-Rubbed Pork Ribs

Rack of pork ribs, trimmed. Credit: Copyright 2016 David Latt
Cooking time depends on the size and thickness of the rack.
Buy good quality pork. Asian and Latin markets are often a reliable source of fresh pork products. Unlike the ribs sold in upscale supermarkets, the ribs in these markets will most likely be untrimmed.
Above the actual ribs, the rack will have a top portion with boneless flap meat and a section with thick bones similar to country style ribs.  Another smaller piece of flap meat will stretch across the back of the rib bones.
Requiring only a sharp filleting knife and a few minutes, removing the flap meat and the top portion is not difficult. The flap meat is excellent to use in stir fries, slow roasted in the oven or grilled on the BBQ.
A white membrane is attached to the outside of the flap meat. Use a sharp filleting knife to separate the meat from the membrane and discard.
The flap meat and country style bones can be prepared in the same manner as the ribs.  They will cook more quickly and should be removed from the 250 F oven after a total of 2 to 3 hours depending on thickness.
While the rack of ribs does not have to be turned over, the flap meat and country style bones should be turned over after one hour for even cooking. After another hour, use kitchen shears to cut off a small piece of meat to test for doneness. Return to the oven if the meat is not yet tender.
To eat the country style ribs, have a sharp paring knife handy to help cut out those hard to reach tasty bits tucked between the bones.
The ribs can be cooked ahead and reheated. In which case, do not cut apart the ribs until ready to serve. Reheat in a 300 F oven for 15 minutes.
Prep time: 30 minutes
Cooking time: 6 to 8 hours
Resting time: 5 minutes
Total time: 6 hours, 35 minutes to 8 hours, 35 minutes
Yield: 4 servings
Ingredients
1 rack pork ribs, 4 to 5 pounds, washed, dried
3 cups brown sugar
2 tablespoons kosher salt
2 tablespoons freshly ground black pepper
¼ cup cumin
¼ cup coriander
½ teaspoon cayenne (optional)
Directions
1. Place a wire rack in the middle of the oven. Preheat to 250 F.
2. Select a baking pan or cookie sheet that is 2 inches longer than the rack of ribs. Cover the pan with aluminum foil for easy clean up. Place a wire rack on top of the aluminum foil.
3. Lay the rack of ribs on a cutting board, bone side up. Use a sharp filleting knife to remove the tough membrane on the bone side of the rack. Let the knife help you lift the membrane. Use your fingers to pull the skin off the bones and discard.
4. Do not cut off any fat.
5. In a bowl, mix together dry ingredients.
6. For easy cleanup, lay a sheet of plastic wrap on the cutting board. Place the rack on the cutting board. Layer a thick coat of the dry spices onto both sides, covering the meat and bones.
7. Reserve left-over dry rub in an air tight container and refrigerate for later use.
8. Carefully place the rack of ribs on the wire rack meat side up.
9. Put the baking sheet into the preheated oven.
10. Roast six hours. Remove from oven. Use kitchen shears to cut off a small piece and taste.
11. The outside should have a jerky-crispness. The meat inside should be moist and tender. The tapered end of the rack where the bones are small will cook faster than the rest of the ribs. Use the kitchen shears to cut off that section before returning the rack to the oven for another one-two hours. Be careful not to dry out the meat.
12. Once the ribs are cooked, remove from oven and let the meat rest five minutes.
13. Cut between the rib bones and chop into pieces any flap meat without bones. Serve hot with a green salad, Cole slaw, baked beans or freshly steamed vegetables.

Saturday, January 25, 2020

Have a Picnic for Super Bowl Sunday - Kimchi Chicken Wings, Salads & So Much More

A week to go for Super Bowl Sunday and I have my menu planned. No chips or dips. No ordering in (although a sausage pizza with mushrooms, onions and extra cheese would be nice). A great game deserves great food.

I'm making favorite dishes, ones designed to share at a picnic or at buffet-style Super Bowl watching party.


I love my kimchi chicken wings (see below), sticky sweet with heat, moist and tender. Nothing is better except fried chicken the way chef Wes Whitsell showed me for a cooking video we did when he was at Manuela DTLA. His fried chicken is crispy and moist. For the cooking demonstration he made wings, thighs and legs. He doesn't like breasts because they don't have enough flavor. I pretty much agree. For my pot luck contribution, I'm making cut apart wings and legs, the easiest parts to eat at a picnic.


I'm also making carrot salad with golden raisins soaked in lemon juice & seasoned with black pepper, Yukon gold potato salad with charred corn & parsley, a charred corn & vegetable saladroasted beet saladgarbanzo bean salad with charred onions & Lacinato (purple) kale, salt boiled broccoli florets and a buttermilk custard pie I saw Martha Stewart demonstrate on her PBS show.


I'll also make an Italian parsley salad with chopped vegetables and pitted olives and a Little Gem lettuce salad with carrot rounds and feta cheese, served with whole wheat lavash.


Only recently did I discover Little Gem lettuce. First, at Glatt, a kosher market, on Pico east of Robertson and then at the Wednesday Santa Monica Farmers Market at the Garden of Organic stand. At first I thought they were "baby" romaine lettuces. They have a cleaner, crisper flavor, with less water and more crunch. Wrapped in a damp kitchen towel and placed into a plastic bag, the heads will keep fresh in the refrigerator for three weeks.


Here's the recipe I'll use for the Super Bowl (which is exactly the recipe I use when I make the salad at home except sometimes I'll trade out the feta for blue cheese).

Crispy Little Gem Lettuce Salad

When making the salad, leave the leaves whole so they don't wilt.

For the olives, use any kind you enjoy. We like Castelvetrano Green olives, which can be found pitted for easy use, although olives taste best when not pitted.


Serves 4

Time to prepare: 20 minutes

Ingredients

2 heads Little Gem Lettuce, leaves removed whole, washed, pat dried

1 large carrot, washed, ends removed, peeled, cut into thin rounds

1 large tomato, stem end removed, washed, pat dried, cut into dime size pieces

1 cup pitted olives, roughly chopped

1 scallion, ends removed, washed, brown leaves discarded, cut into paper thin rounds (optional)

1/2 cup feta, pat dried, crumbled

1 medium avocado, washed, peeled, pit and any brown spots removed, cut into dime sized pieces

1/2 cup homemade croutons (optional)

2 tablespoons olive oil

1/4 cup balsamic vinegar, reduced over a low flame to 2 teaspoons, cooled

Sea salt and freshly ground black pepper to taste

Directions

Lay the Little Gem leaves in the bottom of a serving bowl. Sprinkle on the carrots, tomatoes, olives, scallions (optional), feta, avocado and croutons (optional).

Just before serving, season with sea salt and black pepper, drizzle on olive oil and reduced balsamic vinegar.

Serve with a knife and fork.

Kimchi Chicken Wings

Chicken wings are sold whole, the drumstick only or the two-bone part. If you prefer one part of the wing over another, buy only those. The whole chicken wing will be less expensive and the wing tips can be roasted and used to create stock.

Do not use the whole chicken wing, which is too difficult to eat. 


I prefer preservative-free kimchi. I have been enjoying Mommy Boss napa cabbage kimchi. Read the label carefully because there are different kinds of kimchi, I would recommend only using cabbage kimchi without dried shrimp.

Serves 4

Time to prepare: Marinate overnight, prep 20 minutes, bake 60 minutes

Ingredients

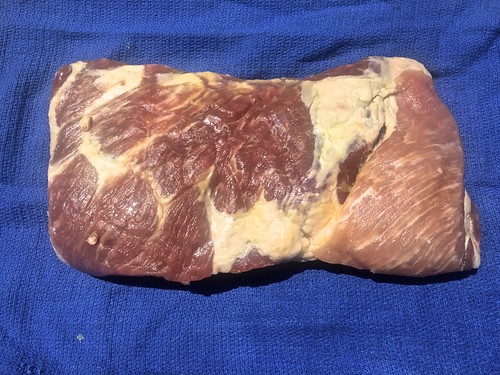
2 pounds chicken wings

1 cup kimchi, without preservatives

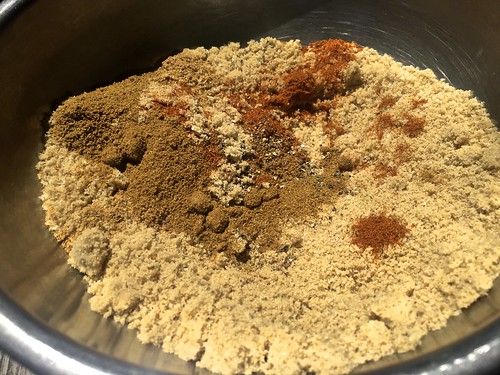
1/2-3/4 cup brown sugar, depending on taste

1 medium yellow onion, washed, pat dried, peeled, root and stem removed, thin sliced from root to stem

1/4 cup kimchi liquid

1 tablespoon olive oil

Directions

Thinly slice kimchi and mix together with onion slices, brown sugar, kimchi liquid and olive oil.

Add chicken wing parts to marinade. Mix well. Place in a covered bowl or sealed plastic bag. Refrigerate over night.

Preheat oven to 350F.

Prepare a roasting pan. Line the bottom with aluminum foil. Because the drippings are sticky (and delicious!) I place a Silpat sheet on top of the aluminum foil so I can easily retrieve the bits of caramelized onions and kimchi. Place a wire on top of the aluminum foil and Silpat sheet.


Place the chicken wings on top of the wire rack, allowing space between each part to allow for even cooking. Reserve the liquid marinade with the onions and kimchi.

Place wings into preheated oven.

While the wings are roasting, place the reserved marinade into a small sauce pan and reduce the liquid by 1/2 over a low heat.

Remove wings from the oven after 30 minutes.

Turn wings over and baste with reduced marinade, placing onion and kimchi slices on each wing.

Return to oven.

After 30 minutes, remove and check for doneness. The onions and kimchi slices should be lightly browned and beginning to crisp. The wings should be tender. If not, return to oven and continue baking. Check every 10 minutes for doneness.

Serve hot as an appetizer or on top of steamed rice. The wings are delicious at room temperature, perfect for a picnic. However they are served, have a good supply of napkins available.

Thursday, April 18, 2019

Perfectly Delicious Tea Sandwiches, Ideal for Snacks, Dinner Parties and Picnics on an Airplane

Tea sandwiches aren't just for fancy tea rooms. They are easy-to-make and enjoyable for just about any occasion.  They look elegant, so they enhance a dinner party table. Easy-to-eat, they're ideal for afternoon snacks or picnics.


Usually made with white bread and also called finger sandwiches, the crustless sandwiches have fillings that can feature salmon, beef, tuna, crab, ham, chicken and cucumber. 

Fun to make, delicious to eat

When I'm working at my desk, a plate of tea sandwiches and a cup of hot coffee keep me happy all afternoon.

I have two favorites. One is made with chopped hardboiled eggs mixed together with finely chopped parsley, carrots and capers, flavored with mayonnaise, sea salt and freshly ground back pepper.


The other is as delicious as it is elegantly simple.

Thin radish slices are placed on buttered bread, seasoned with flake salt and freshly ground black pepper. For added flavor, I top the radishes with slices of homemade picked onions. 

On airplanes, I make a picnic lunch to counteract tedium and discomfort. After I'm settled into my too-snug seat,  I look for ways to make the experience more fun. I put on headphones, watch a movie and pamper myself with a meal of tea sandwiches.

No matter the turbulence, the discomfort of sitting too close to a stranger or the lack of leg room, when I'm snacking on my elegant sandwiches, I'm happy.

Quality above all

Tea sandwiches are only as good as the ingredients. 

Ideally the eggs and radishes come from a farmers market or a quality grocery store. Use sweet butter (unsalted), Best Foods/Heilman's Mayonnaise (my preference) and a good quality white bread. Marukai, our local Japanese Market, carries baked goods from MamMoth Bakery.  I use the bakery's thin-sliced white bread. 

Tea sandwiches can be as heavily seasoned as you enjoy, or, like the egg salad and radish sandwiches, lightly seasoned with flake salt (or sea salt) and freshly ground black pepper. 

Pickled Spring Onions

Spring onions are scallions that have matured in the ground and developed a fat bulb.


Thin-sliced pickled spring onions brighten the flavor of the radishes. Prepare them a week before use. Kept refrigerated in a sealed jar, the onions will last for months as their flavor evolves. Besides placing in tea sandwiches, serve the pickled spring onions with seared steak and roast chicken or added to stews.

Only use kosher salt that is additive-free like Diamond Crystal Kosher Salt.

Ingredients

1 bunch spring onions, washed, root ends and discolored leaves removed

2 cups water

2 cups white wine vinegar

1 tablespoon whole black peppercorns

1/4 - 1/3 cup kosher salt, depending on preference

4 dried bay leaves

Pinch hot pepper flakes (optional)

1 tablespoon extra virgin olive oil

Directions

Sterilize a large glass jar by boiling in water or cleaned in dish washer.

Leaving 2" of greens attached to the bulbs, cut off the remaining length. Place the bulbs and all the greens into the jar.

Stir kosher salt into water to dissolve. Mix together with vinegar. Add aromatics and olive oil. Stir well. Since the pickled spring onions will have the same flavor as the brine, taste and adjust seasonings by adding more kosher salt, vinegar or water as desired.

Pour brine into the glass jar. Make more brine if needed to cover the onions. Place into refrigerator for a week before using.

Thin-Sliced Radish and Sweet Butter Tea Sandwiches

These days, there are a great many radish varietals at farmers markets. If you like one of the exotic radishes available, use those. 


For me, a basic red-on-the-outside, white-on-the-inside, fat radish reminds me of the appetizers my dad liked. After a long day at work, he'd settle into his favorite easy chair, sip a Seagram's 7 and 7 and enjoy a pre-dinner plate of appetizers that often included radishes. 


My mom taught me to soak the radishes in clean, cold water for ten minutes. That loosens any dirt so the radishes can be easily cleaned with a damp cloth.


Serve the radishes open faced or sandwich-style. Layer the radishes one-deep or pile them on as much as you like. 

Serves 4-6

Ingredients

1 bunch radishes, greens and root discarded, soaked in cold water 10 minutes, washed clean of any grit

6-8 slices, thin sliced white bread, crusts removed

2 tablespoons sweet butter

Flake salt or finely ground sea salt to taste

Freshly ground black pepper to taste

2 spring onion bulbs, sliced thin (optional)

Directions

Cut the crustless bread slices in half or in quarters. Arrange them on a cutting board and butter them, assemble-line fashion.


Using a sharp knife, slice the radishes into paper-thin rounds.


Arrange the radishes on the buttered bread. Add sliced spring onion onions (optional). Season with flake salt and black pepper. Serve open-faced or as a sandwich.

Egg Salad Tea Sandwiches

Use good quality, extra large eggs and fresh Italian parsley.


The egg salad can be spiced up by adding pepper flakes, curry powder or any spices you enjoy. I prefer a simpler flavoring.

Serves 4-6

Ingredients

6-8 slices, thin sliced white bread, crusts removed

4 extra large eggs

1/4 cup Italian parsley, leaves only, washed, pat dried, finely chopped

1 tablespoon capers, drained, pat dried, finely chopped

2 tablespoons mayonnaise, preferably Best Foods/Hellman's, taste and add more mayonnaise as desired

1 teaspoon kosher salt, preferably Diamond Crystal Kosher Salt

Sea salt, to taste

Freshly ground black pepper, to taste

Directions

Place eggs in a large sauce pan, add kosher salt and cover with water. Place on a high flame, bring to a boil  and cook 10 minutes. Drain eggs and cool with cold water.


When cooled, peel and discard shells.


Finely chop the eggs. Place in mixing bowl. Add parsley, capers and mayonnaise. Mix well. Season to taste with sea salt and freshly ground black pepper.


If not used immediately, refrigerate in an airtight container for up to three days.


Cut the crustless bread slices in half or in quarters. Using a flat knife, spread egg salad on the bread. Serve open-faced or as a sandwich.

Wednesday, July 1, 2015

Pot Luck Picnic

Summer is here. It's time to grill. It's time to pack a lunch and have a picnic. This Fourth of July is a model of our summer dining. We've planned a pot luck picnic with friends. We'll meet at 6:00pm in the park across the street from the high school football field, share dishes, hang out and wait until it gets dark (usually between 9:15pm and 9:30pm) when the fireworks begin.
In the morning I advance the picnic. Around 10:00am, I lay out half a dozen blue plastic tarps to mark where we'll assemble in the park. Everyone knows to bring a blanket, food and beverages to eat and enough extra to share, beach chairs and  sweaters because it does get cold in the evening.

As the sun goes down and the street lights dim, like sunflowers tracking the sun, we'll turn our beach chairs toward the football field. The fireworks begin slowly, grow in intensity, seem to stop and then rise again in a drawn out cacophony of explosions, whizzing skyrockets and overlapping designs of light. Accompanying each thump of the mortars sending fireworks overhead is an explosion which in turn is accompanied by wow's, whoa's, oooh's and aaah's from our friends and the crowd that fills the park.
As quickly as the fireworks end, even as the smoke still hangs in the air, the blankets and blue tarps are folded, the picnic baskets are packed up, trash is collected and everything is loaded into cars that will then join a slow moving serpentine cavalcade of bumper-to-bumper traffic that extends the evening another half hour or sometimes longer.
The first part of the evening is such fun. For our pot luck picnic, everyone brings their favorite dishes that are easy to transport and share.

Potato salad, roasted vegetable salad, carrot salad, deviled eggs, fried chicken, spicy ginger-lime chicken wingskosher dill pickles, Moroccan vegetable pickles, fresh fruit salad, tossed green salads, salt boiled green beans tossed with roasted hazelnuts in a simple vinaigrette, roasted beet salad, peanut brittle, a fig tartflourless chocolate cake..... The list goes on and on.
And the sharing is so much fun.

Some friends who love to cook, prepare their favorites. Others use the picnic as a time to pick up a selection of cheeses, olives, crackers and fresh bread to share.

I'll bring the sautéed pistachios with citrus rind bits that are so delicious as a snack. My wife doesn't enjoy anchovies so this is a time when I can make deviled eggs with anchovies and capers because I have friends to share them with.
For dessert, I wish there was a way I could heat hot fudge for hot fudge sundaes with caramelized almond slivers. That's a little too impractical for a picnic so that particular dish will have to wait until we're home.

When we travel, I use the same approach to eating in a car or on an airplane or train. Pack a meal as if you are going on a picnic is a great way to turn the trip into a culinary feast.

So, all the best for Fourth of July, summer picnics and long distance travel.

Pickle Me Up! It's Thanksgiving!

Pickles are delicious anytime of the year. For Thanksgiving they are especially good. Their crunch and acidity counterbalances the delicious...