Showing posts with label corn. Show all posts

Monday, September 5, 2022

Corn Salad, Elote Style for End of Summer Feasts

Today's Labor Day, tomorrow it's back to work after a wonderful vacation-work trip to The Netherlands and Berlin. Last night we had our annual dinner with friends at Back On The Beach (445 Pacific Coast Hwy, AKA Palisades Beach Road, Santa Monica CA 90402). Today is the last dinner service at Back On The Beach so we were happy to enjoy a meal and the sunset.

We're joining a potluck dinner tonight at our neighbors around the corner. We're looking forward to catching up and hanging out. We're bringing homemade pickles and my version of an elote salad. I'm reprising the post I wrote after a trip to Mexico.  Enjoy!

Mexican street food 

Travel in Mexico and you'll encounter street vendors selling a great number of delicious food snacks. Elote is one of the best. An ear of corn is grilled, dusted with dry cheese, slavered with mayonnaise and seasoned with chili powder and fresh lime juice. The ear of corn is always served whole, sometimes resting in a paper dish or with a stick in the bottom like a corndog.


Elote is delicious but messy to eat. A whole ear of corn takes two hands to manage. And, with each bite, the finely grated Cotija cheese floats into the air, landing on clothing.

Deconstructing elote

Cutting the kernels off the cobs makes the seasoned corn easier to enjoy. In Mexico there is a corn kernel snack called esquires, which employs some of the elote seasonings. The recipe I settled on uses olive oil instead of mayonnaise. That way the salad can be served as a light entrée topped with a protein or as a side dish accompanying grilled vegetables, meats, poultry and fish. A perfect summer recipe.


The best way to cook corn on the cob is a topic of heated debate. There are those who will only boil corn, others who will only grill it. I have seen elote prepared using both. My preference is to strip off the husk and grill the ear so that some of the kernels are charred, adding caramelized sweetness to the salad.

Just the right cheese

What gives elote its distinctive flavor is the combination of spicy chili powder, fresh lime juice and Mexican Cotija cheese. 

Powdery when finely grated, Cotija cheese is salty so you may not need to add salt when you make the corn salad. Often described as having qualities similar to feta and Parmesan, Cotija tastes quite different.


Mexican Corn Salad

Adding finely chopped Italian parsley to the seasoned corn kernels brightens the flavors. Cilantro can be used instead of parsley to give the salad a peppery flavor.

The corn can be prepared ahead and kept in the refrigerator overnight. In which case, do not add the Cotija cheese or parsley until just before serving.

To create a colorful salad, just before serving, toss the seasoned corn and parsley with quartered cherry tomatoes, cut-up avocados and butter lettuce or romaine leaves.

After tossing, taste the salad and adjust the amount of Cotija cheese and chili powder and, if needed sea salt.

Prep time: 10 minutes

Cook time: 15 to 20 minutes

Total time: 25 to 30 minutes

Yield: 4 entrée servings or 8 side dish servings

Ingredients

4 tablespoons olive oil, divided

1/2 teaspoon sea salt 

1/4 teaspoon freshly ground black pepper

4 large ears of corn, husks and silks removed, washed, dried

1/2 cup finely grated Cotija cheese

1/2 teaspoon chili powder

Directions

1. Preheat an indoor grill or outdoor barbecue to hot.

2. Pour 2 tablespoons olive oil into a flat pan and season with sea salt and black pepper.

3. Roll the ears of corn in the seasoned olive oil to coat all sides.

4. Using tongs, place the corn on the grill, turning every 2 to 3 minutes so that some of the kernels char, being careful not to burn the ears.

5. After the corn is cooked on all sides, remove and let cool in the flat pan with the seasoned olive oil.

6. To cut the kernels off the cob, use a sharp chef's knife. Hold each ear of corn over the pan with the seasoned oil and slice the kernels off the cob.


7. Transfer the kernels and the remaining seasoned oil into a large mixing bowl.

8. Add Cotija cheese, chili powder and parsley. Toss well.


9. Drizzle the remaining olive oil over the salad and toss.


10. Serve at room temperature with lime wedges on the side.

Friday, August 9, 2019

Brighten Up a Summer Corn Salad with Mexican Elote Spices

With an abundance of corn this summer, I've been grilling and salt-boiling corn on the cob.


Seasoned with sea salt and black pepper and, sometimes, with luxurious melted butter, I couldn't be happier. On a trip to Mexico, I enjoyed grilled corn on the cob, elote. That Mexican classic made me think about making a salad that trimmed down on the fat, retained the same spices and built out the flavors.

Mexican street food 

Travel in Mexico and you'll encounter street vendors selling a great number of delicious food snacks. Elote is one of the best. An ear of corn is grilled, dusted with dry cheese, slavered with mayonnaise and seasoned with chili powder and fresh lime juice. The ear of corn is always served whole, sometimes resting in a paper dish or with a stick in the bottom like a corndog.


Elote is delicious but messy to eat. A whole ear of corn takes two hands to manage. And, with each bite, the finely grated Cotija cheese floats into the air, landing on clothing.

Deconstructing elote

Cutting the kernels off the cobs makes the seasoned corn easier to enjoy. In Mexico there is a corn kernel snack called esquires, which employs some of the elote seasonings. The recipe I settled on uses olive oil instead of mayonnaise. That way the salad can be served as a light entrée topped with a protein or as a side dish accompanying grilled vegetables, meats, poultry and fish. A perfect summer recipe.


The best way to cook corn on the cob is a topic of heated debate. There are those who will only boil corn, others who will only grill it. I have seen elote prepared using both. My preference is to strip off the husk and grill the ear so that some of the kernels are charred, adding caramelized sweetness to the salad.

Just the right cheese

What gives elote its distinctive flavor is the combination of spicy chili powder, fresh lime juice and Mexican Cotija cheese. 

Powdery when finely grated, Cotija cheese is salty so you may not need to add salt when you make the corn salad. Often described as having qualities similar to feta and Parmesan, Cotija tastes quite different.


Mexican Corn Salad

Adding finely chopped Italian parsley to the seasoned corn kernels brightens the flavors. Cilantro can be used instead of parsley to give the salad a peppery flavor.

The corn can be prepared ahead and kept in the refrigerator overnight. In which case, do not add the Cotija cheese or parsley until just before serving.

To create a colorful salad, just before serving, toss the seasoned corn and parsley with quartered cherry tomatoes, cut-up avocados and butter lettuce or romaine leaves.

After tossing, taste the salad and adjust the amount of Cotija cheese and chili powder and, if needed sea salt.

Prep time: 10 minutes

Cook time: 15 to 20 minutes

Total time: 25 to 30 minutes

Yield: 4 entrée servings or 8 side dish servings

Ingredients

4 tablespoons olive oil, divided

1/2 teaspoon sea salt 

1/4 teaspoon freshly ground black pepper

4 large ears of corn, husks and silks removed, washed, dried

1/2 cup finely grated Cotija cheese

1/2 teaspoon chili powder

Directions

1. Preheat an indoor grill or outdoor barbecue to hot.

2. Pour 2 tablespoons olive oil into a flat pan and season with sea salt and black pepper.

3. Roll the ears of corn in the seasoned olive oil to coat all sides.

4. Using tongs, place the corn on the grill, turning every 2 to 3 minutes so that some of the kernels char, being careful not to burn the ears.

5. After the corn is cooked on all sides, remove and let cool in the flat pan with the seasoned olive oil.

6. To cut the kernels off the cob, use a sharp chef's knife. Hold each ear of corn over the pan with the seasoned oil and slice the kernels off the cob.


7. Transfer the kernels and the remaining seasoned oil into a large mixing bowl.

8. Add Cotija cheese, chili powder and parsley. Toss well.


9. Drizzle the remaining olive oil over the salad and toss.


10. Serve at room temperature with lime wedges on the side.

Friday, July 7, 2017

Corn is Back. Let the Feast Begin.

Two weeks ago the first corn appeared in our local farmers markets in Santa Monica and Pacific Palisades. After the winter months without corn on our plates, we debated should we enjoy our first taste of corn, boiled or grilled? Both are delicious. Both are easy to prepare. We decided to embrace tradition.
We stripped off the husks and silks. Placed the cleaned ears into a pot of water and turned the burner on high. Every couple of minutes we gave the ears a spin so they would cook evenly. Once the water boiled we knew the ears were cooked.

Plucked out of the hot water, drained and placed onto a platter, we seasoned the ears with sweet butter, sea salt and freshly ground pepper. Old School, simple and delicious.
Those first ears were good but not yet great. Early in the season, the ears' flavor is balanced between starchiness and sweetness. For the scales to tilt toward flavor-bursting sweetness, we'll have to wait for the summer sun to blast the kernels with more heat.

At the Palisades and Santa Monica farmers markets, corn commands a premium, selling for $1.00/ear or 3 ears for $2.00. When we visit my wife's mom in New Jersey, we shop at Wegman's, a local supermarket with affordable pricing and Whole Foods quality. There, the corn can sell for much less. Depending on the supply, the corn can sell for as little as 6 ears for $1.00. Whatever the price, Jersey corn is famous for being especially tender and sweet.

For July 4th, a friend splurged and brought a dozen ears of corn to our fireworks-watching picnic. With a great many dishes to share, we had left-over corn. I volunteered to transform what was left into other dishes.

Versatile corn

First thing was to cut the kernels off the cobs. Cooked corn can be added to salads, stews, soups and stir fries. I love mixing the sweet-crunchy kernels to egg salad and potato salad. As a side with charred steak or grilled chicken, butter poached corn with a dusting of cayenne is delicious.
The cobs have flavor too. Usually consigned to the compost bin, the cobs can be boiled in water to create a savory stock, perfect as a base for soups, sauces, and corn chowder.

With the July 4th corn, I made corn stock, corn chowder, braised chicken with carrots, mushrooms and corn, corn and parsley salad and roasted corn to use in a green salad.
Even with all those dishes, there were still several cups of kernels available which were easy to freeze. To avoid freezer burn, submerge the cooked kernels in corn stock and seal them with air tight lid before placing in a freezer.
Then, when corn has again disappeared from the markets, the defrosted kernels can be added to a cold weather soup of root vegetables to remind us of summer's bright heat during the darkness of winter.

Corn Stock

If a large number of cobs are not available at any one time, save them in an air tight plastic bag in the freezer. When a dozen or more are available, you can rinse off any freezer crystals and drop them into a pot of boiling water as described below.

Serves 4

Time to cook: 45 minutes

Ingredients

12 or more corn cobs, kernels removed

Directions
For every 12 cobs, place 2 quarts of water into a large pot. Add the cobs. Place the pot on a medium-high flame.

Cook uncovered and simmer 45 minutes to reduce the volume by half.

Taste. The stock should have a mild flavor. Drain and discard the cobs. Use stock immediately or place in small air tight containers and freeze for future use.

Corn Chowder

The vegan/vegetarian version made with corn stock has its own unique, clean flavor. You can also use clam, lobster or chicken stock, preferably home made.
Use either frozen or freshly prepared stock. Do not use powdered or canned stocks because of their high salt content.

Serves 4

Time to prepare: 10 minutes

Time to cook: 30 minutes

Total time: 40 minutes

Ingredients

4 cups cooked or raw corn kernels removed from the cobs

1 small yellow onion, peeled, stem & root removed, washed, finely chopped

2 cups shiitake mushrooms

1 cup Italian parsley leaves, washed, pat dried, stems removed

4 cups stock, preferably corn stock or homemade chicken stock

Dusting of cayenne (optional)

1 tablespoon olive oil

Sea salt and freshly ground black pepper to taste

2 tablespoons sweet butter (optional)

Directions

In a large saucepan, heat olive oil on medium flame. Add onions. Stir and cook until softened but not browned.

Add mushrooms and parsley. Stir and cook until softened but not browned.

Add corn kernels. Mix well. Season with sea salt and freshly ground black pepper. If desired, add sweet butter and cayenne (optional). Cook 5 minutes to combine flavors.

Add stock. Stir well. Raise heat to a simmer. After 10 minutes, taste and adjust seasoning if needed. Reduce flame to medium. Cook another 15 minutes. Taste and make final flavor adjustments.

Serve hot with steamed rice, pasta, buttered bread, croutons or a salad.

Wednesday, August 10, 2016

The Best Egg Salad You Will Ever Make

My mother and grandmother disagreed about many things as mothers and daughters do. They especially disagreed about the proper way to make egg salad.
Real egg salad, my grandmother said, was made with hardboiled eggs and mayonnaise with a little salt and pepper. My mother used those ingredients as a starting point. To her egg salad she added finely chopped celery and, sometimes, scallions. My grandmother thoroughly disapproved.
As a kid, I often found myself caught between the two of them. Siding one time with my mother, another time with my grandmother.

About egg salad, I definitely agreed with my mother. Chopped hardboiled eggs and mayonnaise cried out for more flavor and texture. The celery and scallions were a good start but, ultimately, I decided there were so many more ingredients that would improve egg salad why not add whatever you wanted, as long as the ingredients did not over power the eggs.

I tried lots of ingredients. Mango chutney (not good), raisins (not good), pitted green olives (very good) and pepperocini (very good) to name a few.
Right now I'm happy with adding charred carrots, onions and corn kernels tossed with fresh Italian parsley. The crunch of carrots and corn contrasts with the soft, creamy eggs and mayo. Italian parsley adds a fresh element. A dusting of cayenne or Korean pepper flakes adds a pleasing heat.

For special occasions, I also like to mix in chopped up charred shrimp, crab or lobster. Using a carbon steel or cast iron pan makes charring the vegetables very easy.

I'm pretty certain my mom would approve. I am as certain, my grandmother would not.

The Best Egg Salad

Yield: 4

Time to prepare: 20 minutes

Ingredients

4 eggs, farm fresh, large or extra large
1/2 cup corn kernels, about 1 ear of corn
1 medium carrot, washed, peeled, ends removed, small diced
1 small yellow onion, washed, peeled, ends removed, small diced
1 small bunch Italian parsley, washed, dried, stems removed, finely chopped
2 tablespoons mayonnaise, preferably Best Foods
1 tablespoon kosher salt
1 tablespoon blended oil (70% canola oil, 30% olive oil)
Sea salt to taste
Black pepper, freshly ground, to taste
Pinch cayenne (optional)

Directions

Put kosher salt into quart sized pot filled with water.
Place eggs into water. Put flame onto medium-high.

After water boils, leave eggs in uncovered pot 5 minutes, then turn off heat and cover for 10 minutes.

Remove cover, pour out hot salted water and fill pot with cold water. Allow eggs to cool.

Peel eggs and reserve.
Place carbon steel or cast iron pan on a high heat. When metal smokes, add blended oil and vegetables. Stir frequently to prevent burning. Cook until vegetables are charred. Remove from stove and cool.

Finely chop hardboiled eggs and place into large bowl.

Add cooled charred vegetables and mix well.
Season with sea salt, freshly ground pepper and cayenne (optional). Taste and adjust seasoning.
Add Italian parsley. Mix well.
Add mayonnaise. Mix well. Refrigerate.

Serve with crackers, bread or romaine leaves.

Saturday, November 14, 2015

Spice Up Thanksgiving with a Side Dish Straight Out of Mexico

On Thanksgiving I like the side dishes as much as the turkey. Maybe even more. Cranberry sauce, stuffing with dried apricots, pecans and sausage with fennel, Brussels sprouts with charred onions and almonds....I'm getting hungry thinking about those delicious dishes.
And yet.

As much as I'm looking forward to the sides we have every year, I also want to bring something new to the table. A dish that fits in and yet has a new flavor, something that surprises.

For Zester Daily, I interviewed chef Keith Stich in the Red O Santa Monica kitchen, across from the Santa Monica Pier. He did a video cooking demonstration of an easy-to-make succotash that he created for Thanksgiving.
Red O Santa Monica is part of a group of restaurants in Southern California, Chicago and the east coast created by Rick Bayless who has spent his career popularizing the foods of Mexico. His restaurants serve well-prepared, quality dishes with clean, fresh flavors.
At the Red O Santa Monica restaurant, my wife and I are big fans of his menu. We especially enjoy the ceviche, which may be the best we've eaten. The squid, shrimp and fish are fresh tasting. The sauce is lime-tart and hot in just the right way. And the plantain chips are crisp and delicious. I'm getting hungry again as I think about the ceviche.
Ok, back to Thanksgiving.

As part of the Red O menu, Stich serves Mexican street corn as a side dish. If you've traveled in Mexico you've seen street vendors selling corn on the cob from their carts. Charred and covered with flaky cotija cheese and eaten either in a paper tray or on the end of a stick, the corn has a wonderful smoky, salty flavor.
Stich took the kernels off the cob to serve the corn as a side dish to go with a menu focused on seafood and steaks. For a Thanksgiving side, he combines the ideas of Mexican street corn with a fall classic, succotash. Switching out the beans that are traditionally in the dish, he added butternut squash and he included poblano chiles to amp up the latin flavors.

Helpfully, most of the recipe can be prepared the day ahead which eases the craziness of Thanksgiving day.

Please take a look at the article and video on Zester Daily. The dish is really delicious and chef Stich is fun to watch in the kitchen.

Have a great holiday.

Adding Mexican Spice to Thanksgiving Succotash

Sunday, August 16, 2015

Latin Flavors Spice Up Our Love of Corn

Piled high on tables at farmers markets and in supermarkets, sweet corn is everywhere. At the beginning of summer after a cold, dark winter, the sight of corn leads to a stampede of shoppers.
Every week we brought home bundles of corn because who can resist the fat ears with their light green husks and wispy tassels? And so, happily, we have cooked corn every which way--boiled, grilled on the BBQ and roasted in the oven. 

But now at mid-summer, we feel corn-fatigue.  We have begun to take corn for granted. We need a way to rekindle our love affair with corn.

The solution was easy. All we needed was some Latin excitement.
Elote Mexican Corn Salad
My newest favorite corn salad borrows from the flavors of Mexican street corn called elote where ears of cooked corn are skewered on sticks, flavored with grated cotija cheese and dusted with red pepper powder. I turned that street food snack into a salad, tossed with freshly chopped Italian parsley. 

The recipe is on Zester Daily, please try it and let me know what you think. I love it!


Turn Salsa into a Salad

Salsa and chips or salsa and tacos is the perfect summer light snack. Freshly made, salsa brings the best of the garden to the table. Personally, I like to use cherry tomatoes to make salsa because they have a good sweet-to-acid balance. Toss in charred or roasted corn kernels and the salsa brightens with sweetness.

Grilled Corn Salsa

Adding corn caramelized from light grilling gives this salsa its distinctive sweetness. When you buy corn from the market, look for plump kernels. Avoid ears with wrinkled or shriveled kernels. 
You can use any kind of ripe tomato you enjoy, but I prefer cherry tomatoes because they are sweet and they hold their shape after being cut up. For added color, select a basket with a mix of yellow and red cherry tomatoes.
Serves 4
Ingredients
1 ear of corn, husks and silks removed, washed
1 8-ounce basket of ripe cherry tomatoes, washed, quartered
1 large shallot, ends and skin removed, washed and roughly chopped
½ cup Italian parsley, washed, leaves only, finely chopped
¼ teaspoon cayenne
2 tablespoons olive oil
Sea salt and black pepper to taste
Lemon juice to taste (optional)
Directions
1. Preheat the grill to medium-hot.
2. Drizzle the olive oil on a large plate and season with sea salt and black pepper. Roll the ear of corn to coat. Using tongs, place the corn on the grill. Turn frequently to prevent burning. Remove the corn when all the sides have light grill marks. Let cool. Cut off the kernels and place in a large mixing bowl.
3. Use a rubber or silicone spatula to transfer the seasoned olive oil from the plate into the mixing bowl with the corn.
4. Add the quartered cherry tomatoes, shallot and parsley. Toss well and season with the cayenne. Taste and adjust the flavors with more sea salt, black pepper, olive oil and lemon juice (optional).

Monday, September 15, 2014

Summer’s Last Salad - Charred Corn and Chopped Vegetable Salad

How can summer be over? Honestly, it seems only a few weeks ago that we were in the park watching 4th of July fireworks. Now every day the sun leaves the sky earlier and earlier. 

Walking through our farmers market, the tell-tale signs that fall is closing in are everywhere. The mounds of corn at our farmers market are smaller. The tomatoes aren’t as acidic-sweet as they were last month. The peaches still look beautiful but they aren't as full of flavor with firm flesh.
In these last moments before temperatures plunge and skies cloud over, now is the time to seize the day and celebrate summer before it disappears completely.
Dylan Thomas said that we should “rage against the dying of the light” (Do Not Go Gentle Into That Good Night). Personally I prefer a good chopped salad to ragging against the inevitable.

Charred Corn and Chopped Vegetable Salad

Always examine the ears of corn closely before purchasing. That is always true but at the end of summer, choosing ears carefully is even more important. Ideally the husks should be green and pliant, the tassels moist and the kernels plump. Dimpled kernels are a sign the corn is losing its sweetness. A worm or two isn't a problem. The presence of a live worm says the corn is organically grown. Just cut that part of the cob off and discard.

Use whatever fresh vegetables you enjoy.

My preference is to cut the vegetables into a small dice so they are similar in size to the corn kernels.

Charring the corn adds a smoky-sweetness.

Serves 4

Ingredients

1 basket or 2 cups cherry tomatoes, washed, dried, cut into eighths
2 ears fresh corn or 4 cups of kernels, husks and tassels removed, washed, dried
1 large bunch Italian parsley, washed, dried, leaves only, roughly chopped
1 large carrot, washed, peeled, stem cut off and discarded, cut into a fine dice
1 medium avocado, washed, skin and pit removed, small dice
1/3 cup green and black olives, pitted, finely chopped (optional)
1/2 cup feta cheese, crumbled (optional)
1 red or yellow pepper, washed, dried (optional)
1 cup croutons, homemade preferable
1/4 cup olive oil
1 tablespoon reduced balsamic vinegar (made from 1/4 cup balsamic vinegar reduced on a low flame)
Sea salt and freshly ground pepper to taste

Directions

Place the ears on a plate and drizzle with olive oil. Season with sea salt and black pepper. Char the ears of corn either on the barbecue or in the oven. On the barbecue turn the ears frequently over medium-high eat to char but not blacken. Remove and let cool. If in the oven, preheat to 350F, place the ears on an aluminum foil or Silpat lined baking sheet and roast fifteen or twenty minutes, turning every five minutes for even cooking.

When cooled, remove the kernels from the cobs with a sharp chefs or paring knife. Place in a large mixing or salad bowl.

Reduce the balsamic vinegar over a low flame. Allow to cool.

If using a pepper, char a whole red pepper on the barbecue or over an open flame on the stove. When the skin has turned black, remove and allow to cool. Under a stream of cold water, rub off the blackened skin. Place over a bowl. Using a paring knife, remove the stem. Cut open to release and capture the oils inside the pepper. Discard the seeds. 

Finely dice the cooked pepper. Add 1/4 cup to the salad. In a sealed jar, reserve the remainder to be used in stews, soups or another salad. The cooked pepper will keep fresh in the refrigerator for 2-3 days. Add the reserved pepper oil to the salad.

Add the cut up pepper (optional), cherry tomatoes, avocado, parsley, olives, carrots and croutons to the bowl with the corn kernels. Toss well. If desired, add crumbled feta cheese.

Season the salad with olive oil, reduced balsamic, sea salt and freshly ground black pepper. Toss well and serve.

Variations

Use grated cheddar or crumbled blue cheese instead of feta.

Add a chopped protein like cooked chicken breast or grilled shrimp.

Add 1 tablespoon chopped red onions or scallions.

Add 1/4 cup fresh chopped bell peppers, preferably red and yellow.

Add 10 asparagus spears, woody bottom part removed, washed, charred on the barbecue or roasted in the oven, chopped.


Monday, September 2, 2013

Don't Do This At Home! Keep Your Eye On the Barbie When the Corn's On the Grill

Cardinal sin of cooking. Put a pan on the stove or a steak on the barbie and then go answer a couple of emails. Minutes pass. The emails are sent. A link sent from The Wrap leads to a few more minutes following the latest entertainment news and gossip. More minutes pass as checks are written to pay bills due in three days.
Then....what's that scent in the air? Sweet smoke with a hint of bitterness. Oh, yeah, that's the bacon in the frying pan or the ears of corn on the grill, now burnt to a blackened crisp. Perfect for the trash and compost bin but definitely no good for the table.

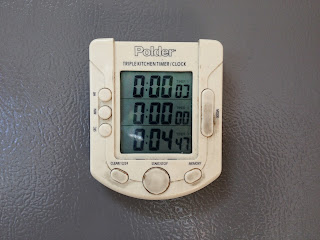
First rule of cooking: use a timer.
Second rule of cooking: keep it with you.

Third rule of cooking: when it goes off, check what you are cooking.

Yesterday I was making grilled corn for one of my favorite summer salads: chopped italian parsley with grilled corn. Simple, easy-to-make and delicious, the salad is such a summer treat. The perfect kind of dish to serve with grilled meats, fish and poultry.

The ears of corn were husked, washed and dried, then dredged through seasoned olive oil and placed on the grill. Nothing could be easier. All I had to do was turn the ears every couple of minutes, take them off the grill, let them cool and remove the kernels, toss them with freshly cut parsley and season the salad with more olive oil and reduced balsamic vinegar.
Easy, except I burnt the nine ears of corn.

That meant a dash back to the Sunday farmers market to pick up nine more ears from Underwood Family Farms and do it all again.

And so it goes. Use a timer. Carry it with you. Listen when it goes off. And all will be good.

Parsley and Grilled Corn Salad

Yield 4 servings
Ingredients

2 ears corn, husks and silks removed, washed, dried
1 bunch Italian parsley, washed, stems discarded, leaves finely chopped
2 tablespoons olive oil
4 tablespoons balsamic vinegar
Sea salt and black pepper to taste

Directions

Pre-heat the grill to medium-hot or set the oven to 350F.

Pour 1 tablespoon olive oil on a large plate or baking tray, season with sea salt and black pepper and dredge each ear of corn to coat.

Using tongs, place the seasoned ears of corn on the grill or on a parchment lined baking tray in the oven.

Turn every 3-5 minutes so the kernels brown but don't burn.  Remove once the some of the kernels have browned. Set aside to cool.

Using a sharp chefs knife, cut the kernels off the cobs and collect in a large mixing bowl.

Add the finely chopped Italian parsley, toss well and dress with the remaining olive oil.

Place the balsamic vinegar in a small saucepan over low heat. Gently reduce to 1 tablespoon. Allow to cool and add to the corn and parsley mixture. Toss well.

Serve cold or at room temperature.

Variations

Add 2 tablespoons raw or grilled onions.

Add 1 avocado, diced.

Add 6 quartered cherry tomatoes.

Add dusting of cayenne.

Add 2 cups cooked chicken breast or grilled shrimp.

Saturday, June 30, 2012

Bulk Up and Trim Down for the 4th of July: Brown Sugar Ribs and Open Faced Cheese sandwiches

For 4th of July there's always a tug of war in our house. Do we go traditional and make ribs, hot dogs, hamburgers, grilled corn on the cob, cole slaw, potato salad and apple pie? Or, should we keep an eye on calories as we watch the fireworks, serving fresh fruit, salads and lighter fare?

In the spirit of liberty and freedom, why not do both? That means brown sugar ribs, deliciously fatty, sweet and salty and open faced melted cheese sandwiches with shrimp for a lighter but no less finger-licking-food entree with  tossed arugula and homemade crouton salad and end of the season sautéed asparagus for greens.

And, because the farmers market is filled with delicious berries and fruit, for dessert have a fresh fruit salad with blue berries, freshly picked strawberries, ripe yellow peaches and dark purple pluots.

The good news, none of these dishes take much time to prepare and they all work beautifully in the backyard or packed in a picnic basket.

Open Faced Cheese Sandwiches with Grilled Shrimp

Serves 4
Ingredients:

2 large slices of white or whole wheat French bread or 4 smaller slices of bread/person
16 medium, raw shrimp, peeled, deveined, washed and pat dried
1/2 pound white cheese (Comte, cheddar or Monterey Jack), thin sliced
1/2 tablespoon olive oil
Sea salt and pepper to taste
1 tablespoon mustard (deli, dijon or brown) (optional)
Sesame seeds, roasted (optional)
2 tablespoons scallions, white and yellow parts, thin sliced (optional)

Directions:

Heat a bbq grill. Toss the shrimp in the olive oil, seasoned with sea salt and pepper. Grill evenly one minute on both sides to get light charring. Remove.

Lightly toast the bread. I prefer thin slices so the cheese and shrimp predominate. Line up the slices and prepare them assembly line style. If you like mustard, spread a thin layer on the bottom of each toast, topped with 2-4 shrimp, depending on the size of the slice.

Lay thin sheets of cheese over the shrimp and for added flavor sprinkle sesame seeds and/or scallions on top.

Preheat the oven or toaster oven to 350 F degrees. Lay a sheet of aluminum foil or a silpat sheet on the bottom of a cookie sheet. Place the open-faced sandwiches on top. Place into the oven for 15 minutes or until the cheese has melted.

For a beautiful crusty finish, raise the temperature of the oven to broil and cook until the cheese lightly bubbles and browns. Be careful not to burn.

Remove from the oven and serve.  If transporting to a picnic, let cool on a wire rack, pack in an airtight container with sheets of waxed paper between layers. Do not refrigerate. Serve at room temperature.

Variations:

Instead of mustard use remoulade sauce or mayonnaise

Dust the shrimp with cayenne for added heat

After the shrimp are grilled, toss with 1 tablespoon finely chopped mango chutney

Brown Sugar Pork Ribs


The cooked ribs can be kept in the refrigerator covered 2-3 days or frozen in an air-tight freezer bag.

Yield 4 servings

Ingredients

1 3-pound rack, pork ribs, washed, pat dried
2-3 cups brown sugar
1/4 cup kosher salt
1 teaspoon cumin 
1/4 teaspoon cayenne
Olive oil
Black pepper
6 ounces Italian tomato paste
1 small yellow onion, peeled, finely chopped
2 garlic cloves, peeled, finely chopped

Directions

Trim excess fat, the membrane, and flap from the ribs. Caprial Pence the owner-chef of Caprial's Bistro in Portland, Oregon shows how to prep the ribs with easy-to-follow photographs. Reserve the flap, trimmed of its membrane, to grill for tacos.

Spread a sheet of plastic wrap on the counter 5” larger than the rack. Dust the meat side of the ribs with the cumin.

Mix together the brown sugar, cayenne and kosher salt. Spread half the dry mix on the plastic wrap. Lay the ribs on top, then spread the remainder of the dry mix to cover. Place a second piece of plastic wrap over the ribs, seal, fold in half and place into a Ziploc or plastic bag. Place in a pan overnight in the refrigerator.

In the morning remove the ribs. The dry mix will have transformed into a slurry. Very alchemical! 

In a sauce pan sauté the onions and garlic with olive oil until lightly browned, season with pepper. Remove the ribs from the plastic bag. Capture the liquid from the plastic bag and transfer to the sauce pan. Add the tomato paste and simmer the sauce on a low flame for 20 minutes. Taste and adjust the flavor as necessary.

Line a large baking tray with tin foil. Place a wire rack on top of the baking tray and lay the ribs on the rack. The ribs can either be cooked in a 350 degree oven or on the “cold” side of a covered grill with the heat on high.

Whether on the grill or in the oven, cook the ribs 30 minutes, turn them over, cook another 30 minutes and turn over again. If the ribs are tender, then baste the ribs with the sauce and cook another 30 minutes on each side or until the meat is tender. 

Remove from the oven, cut apart the individual ribs, and serve.


Saturday, November 5, 2011

Corn Soup for the End of Summer and Start of Fall

This is my second corn recipe in as many posts. Knowing that corn is about to go out of season makes me want it all the more. 
The recipe for corn soup I wrote for Zester Daily has been picked up by Yahoo's food site, Shine. I'm very happy the word is getting out about a soup I think is easy to make and delicious. 

Friday, October 21, 2011

Corn on the Cob Gets Dressed Up For Dinner

We celebrate summer with grilled meats and boiled corn, the golden ears arriving at the table, resting in silky pools of melted butter, ready for a dusting of freshly ground sea salt and black pepper.
Many people hunger so much for corn they eat it every chance they can to such an extent that, sooner or later, familiarity breeds disinterest and even a little disdain. 

Where it seemed so celebratory at the beginning of summer, by August they turn away when a platter of corn is placed on the table. 

That's pretty much the way it's been for me.

On my last trip to our local farmers market, I hadn't planned on buying corn until I noticed that very few farmers were selling corn and those that were had very little to sell. Arriving late, the corn was almost sold out. 

Talking with a farmer, I learned that local corn will disappear from the market in a couple of weeks. After that, no more corn until the spring.

I bought half a dozen ears, deciding we should have a farewell to corn dinner. Preparing the ears by grilling or boiling would still be great, but I wanted to do something different. 

At Cuban restaurants in New York, corn on the cob is served with butter, mayonnaise and grated cheese. The sweet chewy corn kernels benefit from those added flavors.

I liked the idea of a topping on the corn but decided on a different direction. 

Corn on the Cob with Garlic-Onion Crisps
Serves 4

Time 30 minutes

Ingredients

4 ears corn, husks and silks removed, washed and dried
1 tablespoon sweet butter
1 tablespoon olive oil
1 medium yellow onion, ends and skin removed, finely sliced
2 garlic cloves, skins removed, finely chopped
1/4 cup Italian parsley, leaves only, left whole or finely chopped
Sea salt and pepper

Directions
The corn can either be grilled or boiled. To grill, lightly drizzle each ear with a small amount of olive oil and season with sea salt and pepper. Place on a hot grill and turn frequently until lightly browned.  If boiled, place the ears of corn in a large pot of water, turn the heat on high, turn the corn frequently and remove when the water boils. Keep warm.

Heat the butter and olive oil in a frying pan. On a medium high flame, sauté the onions, garlic and parsley until lightly browned and crispy.

Cut the corn into 2" long sections, place on a serving platter. Sprinkle the onion-garlic-parsley crisps over the corn and serve.

Variations

Add heat to the sauté with 1/4 teaspoon cayenne powder.

After topping the corn with the sauté, dust the corn with freshly grated Parmesan cheese.

Friday, June 3, 2011

Lots of Veggies and a Little Meat

I like meat. Give me a thick ribeye steak with sauteed onions and roasted fingerling potatoes, a simple arugula salad with a reduced balsamic vinaigrette and I'm a happy camper.

Even when I crave a big plate of veggies, I still want some meat. A bit of sausage and chicken on the bone adds flavor and some comfort-food "stickiness" that is oh so very satisfying.

Sauteed vegetables, added to a braise of chicken thighs, wings or legs, is an easy to make meal that's totally satisfying. Some Italian sausage or something spicier like chorizo is frosting on the cake, as it were.

Get some help cleaning and peeling the veggies and it's 30-45 minutes start to finish.

Sauteed Vegetables and Chicken on the Bone

Yield: 4 servings

Time: 30-45 minutes

Ingredients

8 chicken wings, washed
4 chicken thighs, washed
4 chicken legs, washed
4 carrots, washed, trimmed, peeled, cut into rounds
1 medium yellow onion, trimmed, peeled, washed, roughly chopped
4 garlic cloves, peeled, finely chopped
2 ears corn, kernels removed
1 medium sized broccoli crown, washed, end trimmed, stem peeled and julienned, florets quartered
2 Italian sausages, washed, grilled or roasted
1/2 cup Italian parsley, washed, leaves only, finely chopped
3 tablespoons olive oil
Sea salt and black pepper

Method

Use two pans. In one put a tablespoon of olive oil and heat over a medium flame. Season the chicken with sea salt and pepper. Saute until lightly browned, turning frequently. Add 3 cups water and raise the flame to high. Lightly cover with a piece of aluminum foil but do not seal.

Cook for 15 minutes. Keep an eye on the liquid. If need be, add water, a 1/4 cup at a time.

At the same time, get the veggies going in the second pan. Heat the remaining 2 tablespoons of olive oil seasoned with sea salt and pepper. Add the veggies and saute for 10 minutes.

The braising liquid should be greatly reduced to about 1 cup. The chicken should be close to falling off the bone.  If not, cook another 5-10 minutes.

Using a silicone spatula, transfer the veggies and their liquid into the pan with the chicken. Add 3 cups of water for a second braise. Stir well.

Reduce the flame to medium. Lightly cover with a piece of aluminum foil and, again, do not seal.  Simmer 10 minutes, checking the broccoli and carrots, making sure they don't over cook.

Serve in large soup bowls because there will be sauce.

Variations

Add 1 tablespoon sweet butter to the second braise.

Omit the sausage.

Substitute chorizo or another sausage for the Italian sausage.

Substitute 3 pieces finely chopped bacon instead of the sausage.

Add 1/2 pound cooked pasta to the second braise.

Add 1/4 teaspoon red pepper flakes to the veggie saute for heat.

Add 3 cups washed, roughly chopped spinach to the second braise.

Add 6 shiitake mushrooms, washed, finely sliced to the veggie saute.

Pickle Me Up! It's Thanksgiving!

Pickles are delicious anytime of the year. For Thanksgiving they are especially good. Their crunch and acidity counterbalances the delicious...