Showing posts with label grilling. Show all posts

Wednesday, January 31, 2018

Go Green for Super Bowl Sunday! Cook Easy-to-Make Roasted or Grilled Artichokes

We are planning a Super Bowl Sunday party. My plan is to serve "picnic" food. Carrot salad, potato salad, Little Gem green salad, Persian salad, crispy fried chicken, brown sugar salmon and roasted artichokes.

Super Bowl Sunday food should be fun, delicious and healthy.

Spring is happening and artichokes are showing up in our farmers markets. The dark green vegetable, prized by cooks, is healthy and easy-to-prepare.
Looking at an artichoke, with its hard exterior and sharp pointed leaves makes me wonder how anyone figured out they would be good to eat. With a small amount of effort, that tough looking exterior gives up the wonderfully savory flavor bits at the end of the each leaf.
Choosing a good artichoke

Whether you find one that is the size of your hand or a larger one the size of a soft ball, give it a squeeze. If the artichoke feels solid, you've found a good one. An artichoke past its prime will be squishy like a child's squeeze toy. Make sure all the leaves are green. Don't buy an artichoke with brown or blackened leaves.
Having a sharp pair of scissors or kitchen shears, a pairing knife and a chefs knife will make breaking down the artichoke easy.

Roasted or Grilled Artichokes

One person can easily eat one artichoke the size of your hand. The larger artichokes will feed 2-3 people as an appetizer or a side dish. 

Serves 4

Prep Time: 10 minutes

Cooking Time: 30-35 minutes

Total Time: 40-45 minutes

Ingredients

4 medium sized or 2 large artichokes, washed
1 tablespoon kosher salt
2 tablespoons olive oil
1 teaspoon sea salt
1/2 teaspoon black pepper
1/4 cup sweet butter (optional)
Directions

Preheat oven to 350F. Or, set grill (indoor or outdoor) to medium-high.

Place a large stock pot on the stove on a high flame. Add kosher salt. Bring to a low boil. Cover.

To roast the artichoke sections after boiling, cover the bottom of a baking sheet with parchment paper, a Silpat sheet or a piece of aluminum foil. Set aside.

Using scissors trim off the pointy end of each artichoke leaf.

Trim off the stem of each artichoke, flush to the bottom. Discard the stems.

Give each artichoke a flat-top haircut. Place the artichoke on its side. Using a chefs knife, trim off the top 1/4" of each artichoke and discard.

Place the artichoke on the cutting board. Using a chefs knife, cut each artichoke in half, from bottom to the top. Cut each half into two pieces. If the artichoke is large, cut those four pieces in half, creating eight segments.

Working quickly, because the inside of the artichoke will discolor when exposed to air, use a sharp pairing knife to remove the fuzzy part on the inside of each section. Rinse the artichoke sections and discard the fuzzy parts.

Place all the artichoke sections in the boiling salted water. Cover and cook 10 minutes.

Using the pairing knife, test one of the artichoke sections. The knife should easily go into the fleshy part on the bottom of the leaves. If the knife doesn't go in easily, cook another 5 minutes but beware not to over cook the artichokes. They should be firm not mushy.

Place a colander or strainer in the sink. Pour the hot salted water with the artichoke sections into the colander and drain.

Transfer the artichoke sections to a mixing bowl. Drizzle with olive oil. Season with sea salt and black pepper. Toss well to coat.

If grilling, place the artichokes on the pre-heated grill. Turn frequently to avoid burning. Remove when grill marks appear on all sides.

If baking in the oven, arrange the artichokes on the prepared baking sheet, leaving room between the sections.

Place in the oven and cook 15 minutes. Using tongs, turn the sections over and place back in the oven another 15 minutes so they cook evenly.

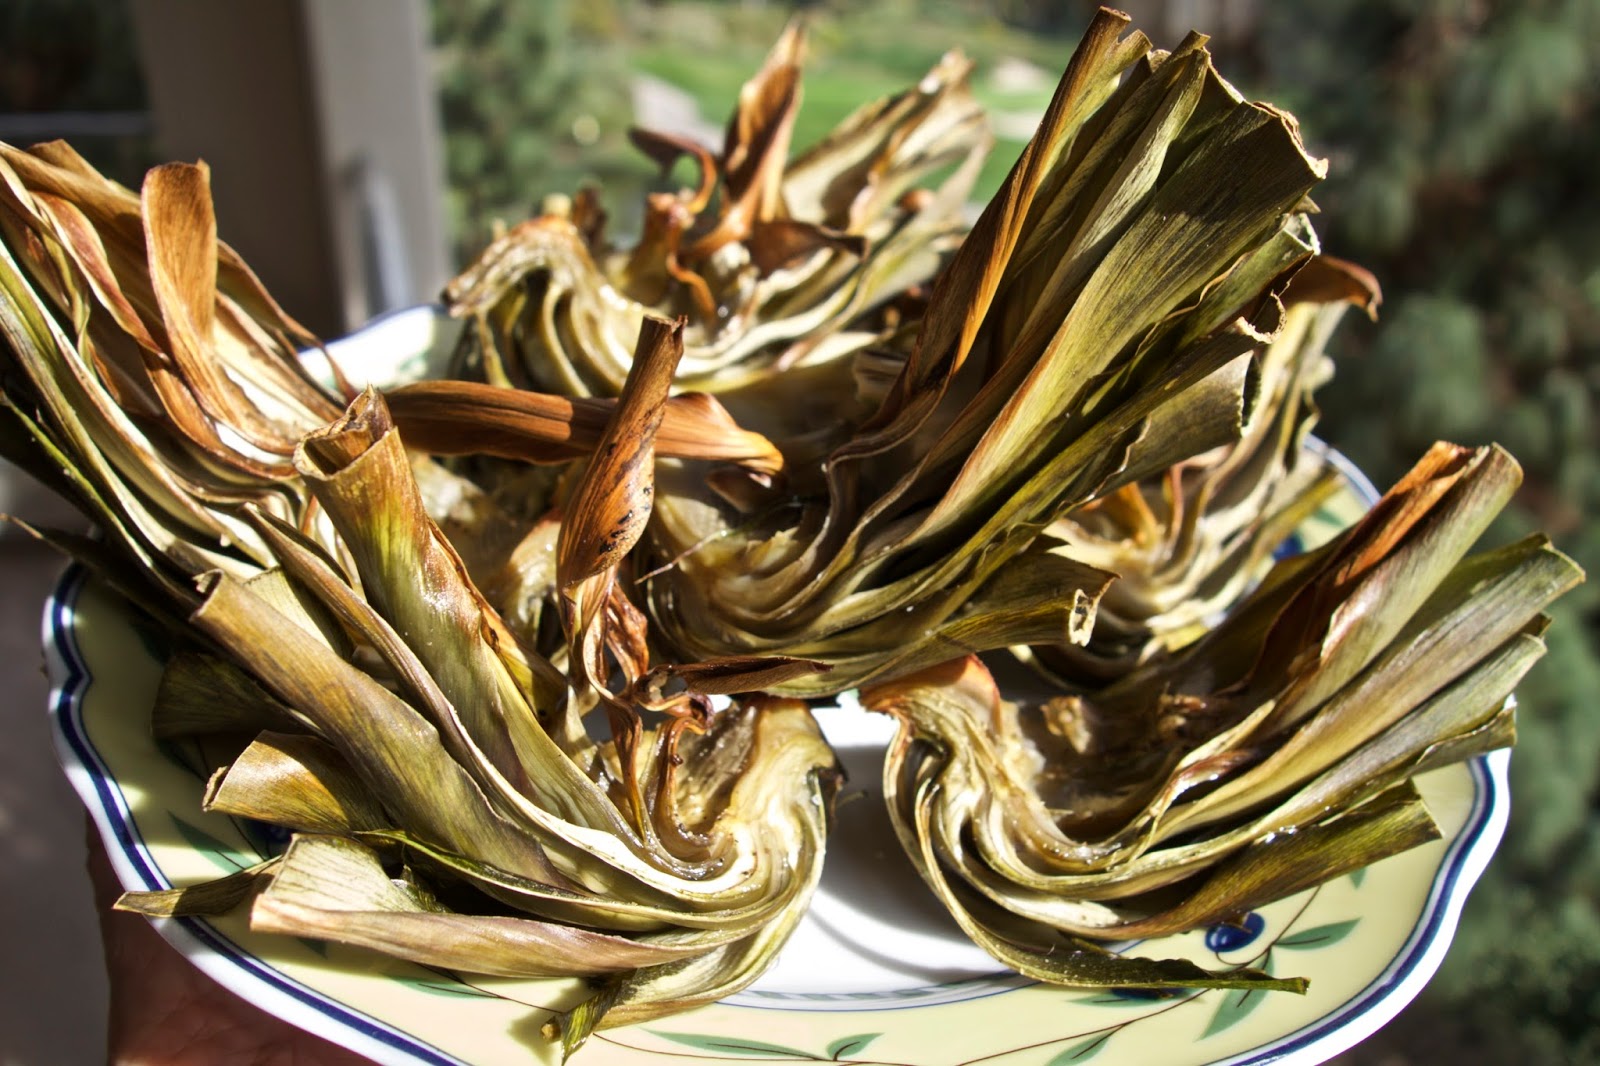
Remove the artichokes from the oven and serve hot or at room temperature with sea salt, black pepper and small dishes of melted butter (optional).

If serving with melted butter (optional), melt the butter in a small saucepan being careful to avoid burning.

Saturday, June 18, 2016

Father's Day Deserves a Feast, Start with the Grill

Once again I will be out of town on Father's Day. I'll miss being with my sons on that special day. We already have a bealted-Father's Day date two weeks later when we will all be in town. I can hardly wait!

Since Father's Day coincides with the start of summer, grilling is the best way to celebrate male parenting.
For me, nothing is better than a platter of grilled Italian sausages with sautéed onions, deveined shrimp seasoned with olive oil, sea salt and black pepper, corn on the cob, charred red peppers mixed with capers and garlic and lobsters split open and doused with pats of sweet butter.  With a tossed arugula and carrot salad, a loaf of freshly baked bread and a fresh fruit salad and I am happy.
The best grilling is the easiest kind. Buy good sausages, seafood and chicken, drizzle with olive oil, season with sea salt, pepper and any dried herb you fancy, put it on a hot grill, turn diligently to prevent burning and serve when it's done.

When the boys come to the house to celebrate a birthday, mother's day or father's day, they frequently take command of the grill. As my younger son, Michael, reminds me, they are my sons so of course they are good cooks. And that makes me very very happy.

Our other son, Franklin, doesn't regard a meal a proper meal unless there are appetizers. The secret to a great grilled meal is what's served on the side. My contribution to your Father's Day celebration are three of my favorite sides. 

All three are addictive so you may find you'll be eating them all summer long. They are all easy-to-make. The tapenade and lavash crisps can be made a day or two ahead. The grilled corn salsa is best made fresh.


Grilled Corn Salsa

Adding corn caramelized from light grilling gives this salsa it’s distinctive sweetness. When you buy corn from the market, look for plump kernels. Avoid ears with wrinkled or shriveled kernels.
You can use any kind of ripe tomato you enjoy, but I prefer cherry tomatoes because they are sweet and they hold their shape after being cut up. For added color, select a basket with a mix of yellow and red cherry tomatoes.

Serves 4

Ingredients

1 ear of corn, husks and silks removed, washed
1 8 oz basket of ripe cherry tomatoes, washed, quartered
1 large shallot, ends and skin removed, washed and roughly chopped
½ cup Italian parsley, washed, leaves only, finely chopped
¼ teaspoon cayenne
2 tablespoons olive oil
Sea salt and black pepper to taste
Lemon juice to taste (optional)

Directions

Pre-heat the grill to medium-hot.

Drizzle the olive oil on a large plate and season with sea salt and black pepper. Roll the ear of corn to coat. Using tongs, place the corn on the grill.  Turn frequently to prevent burning.  Remove the corn when all the sides have light grill marks. Let cool. Cut off the kernels and place in a large mixing bowl.

Use a rubber or silicone spatula to transfer the seasoned olive oil from the plate into the mixing bowl with the corn.

Add the quartered cherry tomatoes, shallot and parsley. Toss well and season with the cayenne. Taste and adjust the flavors with more sea salt, black pepper, olive oil and lemon juice (optional).

Tapenade with Charred Garlic

A secret weapon in last minute cooking, tapenade brightens any meal either as an appetizer or a condiment. If you use pitted, canned olives, making tapenade will take 10-15 minutes.
 
The taste of your tapenade depends on the quality of the olives.

Serves 6-8

Ingredients

1 can pitted olives, drained weight 6 oz., preferably green or kalamata olives
2-3 tablespoons olive oil
2 garlic cloves with skins
¼ cup Italian parsley, washed, leaves only, roughly chopped
¼ teaspoon pepper flakes (optional)
Black pepper to taste

Directions

Skewer the garlic cloves on the end of a knife or a metal skewer and hold over a gas flame to burn off the outer skins. Let cool, remove any pieces of charred skin and roughly chop the cloves.

In a small blender or food processer, place the drained olives, olive oil, garlic, parsley and pepper flakes. Pulse until the olives are roughly chopped. Taste and adjust the seasoning with the addition of black pepper, sea salt, pepper flakes and olive oil.

Pulse again until the tapenade achieves the desired texture. Personally I like a tapenade that has a rustic look with the olives coarsely chopped rather than puréed.

Refrigerate until ready to use and serve at room temperature.

Variations

 2 anchovies packed in oil, roughly chopped and added with the olives. If salted, rinse before adding.

1 tablespoon capers added with the olives.

Lavash Crisps

Served in the Middle East, lavash and pita are commonly used instead of bread. Flat, unleavened lavash has a delicious, lightly grilled flavor when fresh. Making crisps makes use of lavash that might otherwise have gotten stale and gone to waste.
Lavash crisps have more flavor and are more flaky than commercially manufactured chips. Serve them with salsa, tapenade, dips or thin slices of cheese.

The crisps will last for weeks if kept refrigerated in an airtight container. 

Serves 6-8

Ingredients

1 large or 2 small sheets of lavash
1 cup olive or safflower oil
Sea salt and black pepper to taste
5-6 paper towel sheets

Directions

Cut the lavash sheets into 2” squares by cutting the sheet in half, placing the halves on top of each other, cutting those in half and doing that again until the pieces are 2” wide. Cut the 2” wide strips into 2” squares and set aside. If not cooked immediately, store in an airtight container.

In a large frying pan or griddle, heat ¼ cup of the oil. Season with sea salt and black pepper and heat on a medium-low flame. Be careful not to burn the oil or cause it to smoke.

Lay a paper towel sheet on a large plate or baking sheet.

Add the lavash squares to the hot oil. Do not overlap. Using tongs, turn over the lavash when they are lightly browned and cook the other side. They cook quickly so watch them closely.

Remove the cooked crisps and place them on the paper towel. Cook another batch. Place a clean paper towel on top of each layer to absorb excess oil.

Replenish the oil in the frying pan as needed and season with sea salt and black pepper. Allow the oil to reach the proper temperature before adding more lavash.

Discard the paper towels when the crisps cool. Store refrigerated in an airtight container. Serve at room temperature.

Tuesday, June 3, 2014

Father's Day Deserves a Feast, Start with the Grill

Once again I will be out of town on Father's Day. I'll miss being with my sons on that special day. We already have a bealted-Father's Day date two weeks later when we will all be in town. I can hardly wait!

Since Father's Day coincides with the start of summer, grilling is the best way to celebrate male parenting.
For me, nothing is better than a platter of grilled Italian sausages with sautéed onions, deveined shrimp seasoned with olive oil, sea salt and black pepper, corn on the cob, charred red peppers mixed with capers and garlic and lobsters split open and doused with pats of sweet butter.  With a tossed arugula and carrot salad, a loaf of freshly baked bread and a fresh fruit salad and I am happy.
The best grilling is the easiest kind. Buy good sausages, seafood and chicken, drizzle with olive oil, season with sea salt, pepper and any dried herb you fancy, put it on a hot grill, turn diligently to prevent burning and serve when it's done.

When the boys come to the house to celebrate a birthday, mother's day or father's day, they frequently take command of the grill. As my younger son, Michael, reminds me, they are my sons so of course they are good cooks. And that makes me very very happy.

Our other son, Franklin, doesn't regard a meal a proper meal unless there are appetizers. The secret to a great grilled meal is what's served on the side. My contribution to your Father's Day celebration are three of my favorite sides. 

All three are addictive so you may find you'll be eating them all summer long. They are all easy-to-make. The tapenade and lavash crisps can be made a day or two ahead. The grilled corn salsa is best made fresh.


Grilled Corn Salsa

Adding corn caramelized from light grilling gives this salsa it’s distinctive sweetness. When you buy corn from the market, look for plump kernels. Avoid ears with wrinkled or shriveled kernels.
You can use any kind of ripe tomato you enjoy, but I prefer cherry tomatoes because they are sweet and they hold their shape after being cut up. For added color, select a basket with a mix of yellow and red cherry tomatoes.

Serves 4

Ingredients

1 ear of corn, husks and silks removed, washed
1 8 oz basket of ripe cherry tomatoes, washed, quartered
1 large shallot, ends and skin removed, washed and roughly chopped
½ cup Italian parsley, washed, leaves only, finely chopped
¼ teaspoon cayenne
2 tablespoons olive oil
Sea salt and black pepper to taste
Lemon juice to taste (optional)

Directions

Pre-heat the grill to medium-hot.

Drizzle the olive oil on a large plate and season with sea salt and black pepper. Roll the ear of corn to coat. Using tongs, place the corn on the grill.  Turn frequently to prevent burning.  Remove the corn when all the sides have light grill marks. Let cool. Cut off the kernels and place in a large mixing bowl.

Use a rubber or silicone spatula to transfer the seasoned olive oil from the plate into the mixing bowl with the corn.

Add the quartered cherry tomatoes, shallot and parsley. Toss well and season with the cayenne. Taste and adjust the flavors with more sea salt, black pepper, olive oil and lemon juice (optional).

Tapenade with Charred Garlic

A secret weapon in last minute cooking, tapenade brightens any meal either as an appetizer or a condiment. If you use pitted, canned olives, making tapenade will take 10-15 minutes.
The taste of your tapenade depends on the quality of the olives.

Serves 6-8

Ingredients

1 can pitted olives, drained weight 6 oz., preferably green or kalamata olives
2-3 tablespoons olive oil
2 garlic cloves with skins
¼ cup Italian parsley, washed, leaves only, roughly chopped
¼ teaspoon pepper flakes (optional)
Black pepper to taste

Directions

Skewer the garlic cloves on the end of a knife or a metal skewer and hold over a gas flame to burn off the outer skins. Let cool, remove any pieces of charred skin and roughly chop the cloves.

In a small blender or food processer, place the drained olives, olive oil, garlic, parsley and pepper flakes. Pulse until the olives are roughly chopped. Taste and adjust the seasoning with the addition of black pepper, sea salt, pepper flakes and olive oil.

Pulse again until the tapenade achieves the desired texture. Personally I like a tapenade that has a rustic look with the olives coarsely chopped rather than puréed.

Refrigerate until ready to use and serve at room temperature.

Variations

 2 anchovies packed in oil, roughly chopped and added with the olives. If salted, rinse before adding.

1 tablespoon capers added with the olives.

Lavash Crisps

Served in the Middle East, lavash and pita are commonly used instead of bread. Flat, unleavened lavash has a delicious, lightly grilled flavor when fresh. Making crisps makes use of lavash that might otherwise have gotten stale and gone to waste.
Lavash crisps have more flavor and are more flaky than commercially manufactured chips. Serve them with salsa, tapenade, dips or thin slices of cheese.

The crisps will last for weeks if kept refrigerated in an airtight container. 

Serves 6-8

Ingredients

1 large or 2 small sheets of lavash
1 cup olive or safflower oil
Sea salt and black pepper to taste
5-6 paper towel sheets

Directions

Cut the lavash sheets into 2” squares by cutting the sheet in half, placing the halves on top of each other, cutting those in half and doing that again until the pieces are 2” wide. Cut the 2” wide strips into 2” squares and set aside. If not cooked immediately, store in an airtight container.

In a large frying pan or griddle, heat ¼ cup of the oil. Season with sea salt and black pepper and heat on a medium-low flame. Be careful not to burn the oil or cause it to smoke.

Lay a paper towel sheet on a large plate or baking sheet.

Add the lavash squares to the hot oil. Do not overlap. Using tongs, turn over the lavash when they are lightly browned and cook the other side. They cook quickly so watch them closely.

Remove the cooked crisps and place them on the paper towel. Cook another batch. Place a clean paper towel on top of each layer to absorb excess oil.

Replenish the oil in the frying pan as needed and season with sea salt and black pepper. Allow the oil to reach the proper temperature before adding more lavash.

Discard the paper towels when the crisps cool. Store refrigerated in an airtight container. Serve at room temperature.

Monday, June 10, 2013

To Prepare a Father's Day Feast, Fire Up the Grill and Don't Forget the Sides

Since Father's Day coincides with the start of summer, grilling is the best way to celebrate male parenting.

For me, nothing is better than a platter of grilled Italian sausages with sautéed onions, deveined shrimp seasoned with olive oil, sea salt and black pepper, corn on the cob, charred red peppers mixed with capers and garlic and lobsters split open and doused with pats of sweet butter.  With a tossed arugula and carrot salad, a loaf of freshly baked bread and a fresh fruit salad and I am happy.
The best grilling is the easiest kind. Buy good sausages, seafood and chicken, drizzle with olive oil, season with sea salt, pepper and any dried herb you fancy, put it on a hot grill, turn diligently to prevent burning and serve when it's done.

When the boys come to the house to celebrate a birthday, mother's day or father's day, they frequently take command of the grill. As my younger son, Michael, reminds me, they are my sons so of course they are good cooks. And that makes me very very happy.

Our other son, Franklin, doesn't regard a meal a proper meal unless there are appetizers. The secret to a great grilled meal is what's served on the side. My contribution to your Father's Day celebration are three of my favorite sides. 

All three are addictive so you may find you'll be eating them all summer long. They are all easy-to-make. The tapenade and lavash crisps can be made a day or two ahead. The grilled corn salsa is best made fresh.

Grilled Corn Salsa

Adding corn caramelized from light grilling gives this salsa it’s distinctive sweetness. When you buy corn from the market, look for plump kernels. Avoid ears with wrinkled or shriveled kernels.
You can use any kind of ripe tomato you enjoy, but I prefer cherry tomatoes because they are sweet and they hold their shape after being cut up. For added color, select a basket with a mix of yellow and red cherry tomatoes.

Serves 4

Ingredients

1 ear of corn, husks and silks removed, washed
1 8 oz basket of ripe cherry tomatoes, washed, quartered
1 large shallot, ends and skin removed, washed and roughly chopped
½ cup Italian parsley, washed, leaves only, finely chopped
¼ teaspoon cayenne
2 tablespoons olive oil
Sea salt and black pepper to taste
Lemon juice to taste (optional)

Directions

Pre-heat the grill to medium-hot.

Drizzle the olive oil on a large plate and season with sea salt and black pepper. Roll the ear of corn to coat. Using tongs, place the corn on the grill.  Turn frequently to prevent burning.  Remove the corn when all the sides have light grill marks. Let cool. Cut off the kernels and place in a large mixing bowl.

Use a rubber or silicone spatula to transfer the seasoned olive oil from the plate into the mixing bowl with the corn.

Add the quartered cherry tomatoes, shallot and parsley. Toss well and season with the cayenne. Taste and adjust the flavors with more sea salt, black pepper, olive oil and lemon juice (optional).

Tapenade with Charred Garlic

A secret weapon in last minute cooking, tapenade brightens any meal either as an appetizer or a condiment. If you use pitted, canned olives, making tapenade will take 10-15 minutes.
 
The taste of your tapenade depends on the quality of the olives.

Serves 6-8

Ingredients

1 can pitted olives, drained weight 6 oz., preferably green or kalamata olives
2-3 tablespoons olive oil
2 garlic cloves with skins
¼ cup Italian parsley, washed, leaves only, roughly chopped
¼ teaspoon pepper flakes (optional)
Black pepper to taste

Directions

Skewer the garlic cloves on the end of a knife or a metal skewer and hold over a gas flame to burn off the outer skins. Let cool, remove any pieces of charred skin and roughly chop the cloves.

In a small blender or food processer, place the drained olives, olive oil, garlic, parsley and pepper flakes. Pulse until the olives are roughly chopped. Taste and adjust the seasoning with the addition of black pepper, sea salt, pepper flakes and olive oil.

Pulse again until the tapenade achieves the desired texture. Personally I like a tapenade that has a rustic look with the olives coarsely chopped rather than puréed.

Refrigerate until ready to use and serve at room temperature.

Variations

 2 anchovies packed in oil, roughly chopped and added with the olives. If salted, rinse before adding.

1 tablespoon capers added with the olives.

Lavash Crisps

Served in the Middle East, lavash and pita are commonly used instead of bread. Flat, unleavened lavash has a delicious, lightly grilled flavor when fresh. Making crisps makes use of lavash that might otherwise have gotten stale and gone to waste.
Lavash crisps have more flavor and are more flaky than commercially manufactured chips. Serve them with salsa, tapenade, dips or thin slices of cheese.

The crisps will last for weeks if kept refrigerated in an airtight container. 

Serves 6-8

Ingredients

1 large or 2 small sheets of lavash
1 cup olive or safflower oil
Sea salt and black pepper to taste
5-6 paper towel sheets

Directions

Cut the lavash sheets into 2” squares by cutting the sheet in half, placing the halves on top of each other, cutting those in half and doing that again until the pieces are 2” wide. Cut the 2” wide strips into 2” squares and set aside. If not cooked immediately, store in an airtight container.

In a large frying pan or griddle, heat ¼ cup of the oil. Season with sea salt and black pepper and heat on a medium-low flame. Be careful not to burn the oil or cause it to smoke.

Lay a paper towel sheet on a large plate or baking sheet.

Add the lavash squares to the hot oil. Do not overlap. Using tongs, turn over the lavash when they are lightly browned and cook the other side. They cook quickly so watch them closely.

Remove the cooked crisps and place them on the paper towel. Cook another batch. Place a clean paper towel on top of each layer to absorb excess oil.

Replenish the oil in the frying pan as needed and season with sea salt and black pepper. Allow the oil to reach the proper temperature before adding more lavash.

Discard the paper towels when the crisps cool. Store refrigerated in an airtight container. Serve at room temperature.

Friday, May 18, 2012

Asparagus Stalks Memorial Day Picnics

Burgers, hot dogs, potato salad, cole slaw and fresh fruit salads are Memorial Day classics. I look forward to those favorites but to keep them interesting, it's good to add something new and a little unexpected.
When I was growing up, asparagus was one of the fancy vegetables. Carrots, corn and broccoli were the everyday vegetables. Asparagus was saved for special occasions. These days asparagus is affordable, easy-to-prepare and versatile.

Right now asparagus is plentiful in farmers markets. Nutritious, delicious and loaded with healthy minerals, asparagus can be enjoyed raw or cooked, as a salad or a side dish to add zest to a backyard barbecue or afternoon lunch.

Raw Asparagus Salad
Look for small to medium sized stalks that are firm and without blemish or shrivel-marks.

Serves 4

Ingredients

1/2 pound asparagus, washed, white ends trimmed plus an additional 2" cut off and discarded
1 tablespoon olive oil
Sea salt and pepper to taste

Directions


Slice in half the long way the larger stalks just before serving. Just before serving, toss the asparagus with the seasoned olive oil.

Variations

To add heat, dust with a pinch of cayenne or 1/4 teaspoon pepper flakes.

Sprinkle 2 tablespoons flaky goat cheese over the asparagus.

Finely chop 1 garlic clove and lightly sauté until brown, sprinkle over the asparagus.

Grilled Asparagus

Use any size asparagus you like. 
Serves 4

Ingredients

1 pound asparagus, washed, white ends trimmed plus an additional 2" cut off and discarded
1 tablespoon olive oil
Sea salt and pepper to taste

Directions

Heat the grill on a medium flame.

Toss the asparagus in the seasoned olive oil and place on the grill. 

Tongs will help turn the asparagus on the grill. Be careful to brown but not burn the tender stalks. Serve warm.

Variations

Grill with carrots (sliced or whole baby carrots) and serve as a vegetable course or as a side dish.

To add heat, dust with a pinch of cayenne or an additional 1/4 teaspoon freshly ground black pepper.

Steamed or Sautéed Asparagus with Caramelized Garlic, Shallots and Almond Slivers
Use any size asparagus you like. I prefer large or medium sized stalks, cut in half the long way so I can caramelize inside the asparagus.

The dish is as delicious whether you steam or sauté the asparagus. The choice is yours.

Blanched, raw slivered almonds are widely available in supermarkets. From my experience, Trader Joe's has good quality, affordable almonds.

To deceive the eye, the shallot and garlic clove should be sliced to resemble the almond slivers. The surprising sweet-savory/soft-crunch contrast adds to the fun of the dish.

Serves 4

Ingredients

1 pound asparagus, washed, white ends trimmed plus an additional 2" cut off and discarded
1/4 cup blanched, raw almond slivers
1 large shallot, washed, peeled, root end removed, thin sliced
1 large garlic clove, washed, peeled, root end removed, thin sliced
1 tablespoon olive oil
Sea salt and black pepper to taste

Directions

Heat a large frying pan with the olive oil, seasoned with sea salt and black pepper. Add the asparagus, cooking in batches if necessary. Don't crowd them in the pan so they cook evenly. Use tongs to turn them frequently to brown and avoid burning.

Remove the cooked stalks to a plate lined with a paper towel.

In the same pan, cook the shallot, garlic and almonds until lightly browned. Add a touch of olive oil if needed. Season with black pepper.

Either add the cooked asparagus back into the pan with the almond mixture and toss well or plate the asparagus and top the stalks with the almond mixture.

Serve warm.

Thursday, August 12, 2010

The Easiest Pasta You’ll Ever Make Using Grilled Corn and Roasted Garlic


On a recent trip to Sonoma County, my wife and I wandered from the coast to the inland farmland to eat our way across one of America's most productive valleys. We were lucky enough to have some wonderful meals. We especially enjoyed chef Josh Silvers' 
We loved his roasted garlic-butter sauce on his grilled corn, I was inspired to write a recipe that adapted that flavor combination with pasta.  I posted the recipe on Zesterdaily.

Thursday, July 30, 2009

Summer Grilling: Skewered Shrimps & Cherry Tomatoes

Festive enough for a party, quick-and-easy for everyday cooking, skewered shrimp and cherry tomatoes are ready to serve in 30 minutes.

A few words about the convenience of shrimp. In my experience, shrimp that come already shelled and deveined have less flavor and are more susceptible to freezer burn. If you buy shrimp in the shell, the benefits outweigh the added work. Buy the large sized ones (30-35/pound).

Removing the shell is easy enough, if a bit tedious. Grasp the legs in one hand while you rotate the shrimp with your other hand. The shell will come off easily. If you want the tail meat to stay on the shrimp, pinch the very tip of the tail with your fingers and gently pull the meat away from the shell.

With a sharp paring knife, cut down the back of the shrimp, pull away the vein, and discard. Wash the shrimp thoroughly, drain, and keep cold until ready to use.

Save the shells. Put them in a pan with a 1/2 cup water and simmer 10 minutes. Strain and discard the shells. Use the stock to make pasta sauce. To save for later use, freeze the shrimp stock in an airtight container. If any ice crystals accumulate on the stock, while still frozen, wash the crystals off with cold water before defrosting.

To freeze shrimp without fear of freezer burn, toss the deveined shrimp in olive oil, seasoned with sea salt and pepper. Place in a Ziploc-style plastic bag, squeeze out the air, and seal tightly. Flatten out the bag so the shrimp lay next to each other so they'll freeze individually. That way you can remove a few of the shrimp at a time. Lay flat in the freezer.

Skewered Cherry Tomatoes

Cherry tomatoes are plentiful in the summer. Grilled, their sweetness is accentuated.

Yield 4 servings

Time 10 minutes

Ingredients

1 basket cherry tomatoes, washed, stems removed
1/4 cup olive oil
Sea salt and pepper

Method

If you're using wooden skewers, soak them in water at least 1 hour before grilling. Toss the tomatoes in the seasoned olive oil to coat well. Place 3-4 tomatoes on each skewer. Reserve the seasoned olive oil for later use.

Grill the tomatoes on a hot grill, turning frequently to prevent burning. They're cooked when the skin splits. Serve while hot.

Use any left-over tomatoes in a pasta or in a mozzarella-tomato salad.

Grilled Shrimp

Shrimp are naturally sweet and flavorful. Seasoned in a wet marinade or dry rub is all they need. If you're using wooden skewers, soak them in water at least 1 hour before grilling.

Grilled Shrimp with Olive Oil, Sea Salt and Pepper Marinade

Yield 4-6 servings

Time 30 minutes

Ingredients

1 pound shrimp, washed, deveined
1/4 cup olive oil
1/2 teaspoon sea salt
1/4 teaspoon freshly ground black pepper

Method

Toss the shrimp in the seasoned olive oil, place 3-4 shrimp on each skewer and cook on a hot grill, turning frequently to avoid burning. Cook until the shrimp are lightly charred.

If a grill isn't available, the shrimp can be cooked in a 450 degree oven, preferably resting on a wire rack over an aluminum foil covered cookie sheet.

Grilled Shrimp with a Garlic-Ginger-Soy Marinade

Yield 4-6 servings

Time 30 minutes plus 1 hour marinade

Ingredients

1 pound shrimp, washed, shelled, deveined
1/2 cup soy sauce
1/4 cup mirin
1 tablespoon sesame oil
1 tablespoon freshly grated ginger, peeled
2 garlic cloves, peeled, grated
1 medium yellow onion, peeled, cut into shrimp-size pieces
1/2 teaspoon sugar (optional)
1 scallion, washed, thinly sliced, white and green parts
1 teaspoon roasted sesame seeds

Method

Mix together all ingredients and marinate the shrimp for an hour but no more. Any longer and the shrimp will absorb too much of the marinade.

Put 3-4 shrimp on each skewer with a single piece of onion between each shrimp and cook on a hot grill, turning frequently to avoid burning. Cook until the shrimp are lightly charred. If a grill isn't available, the shrimp can be cooked in a 450 degree oven, preferably resting on a wire rack.

Grilled Shrimp with a Tex-Mex Dry Rub

Yield 4-6 servings

Time 30 minutes

Ingredients

1 pound shrimp, washed, deveined
1 teaspoon ancho chili powder
1/2 teaspoon sea salt
1/2 teaspoon paprika
1/2 teaspoon black pepper
1 garlic clove, peeled, grated
1 teaspoon sugar
1 tablespoon beer

Mix the dry ingredients together. Toss the shrimp first in the beer and then with the dry rub.

Put 3-4 shrimp on each skewer and cook on a hot grill, turning frequently to avoid burning. Cook until the shrimp are lightly charred. If a grill isn't available, the shrimp can be cooked in a 450 degree oven, preferably resting on a wire rack.

Wednesday, May 27, 2009

Grilled Vegetables and Grilled Vegetable Salads

Although most of the world thinks there are no seasons in Southern California, those of us who are natives know that isn't the case. In the winter, we are very definitely cold. When my wife and I walk on the beach, she wears a full compliment of winter wear: fur lined hat, gloves, sweater, and jacket.

We also feel winter's grip when the sun disappears in mid-afternoon, requiring lights to be turned on before 5:00pm. With the cold and darkness, these are not easy times. Certainly there are pleasures to be gotten from a crackling fire in the fireplace, hot soups filled with savory bits, and braised meats surrounded by an array of root vegetables. Admittedly those are sweet comforts, but they are brought front and center because our sagging spirits need propping up.

Spring in Southern California is a different matter altogether. Although there is still fog aplenty at the beach where we live, the days benefit from the warmth of the sun's strengthening rays.

Besides sensing the increase of daylight and warmth, we also know that spring has arrived because the local farmers' markets welcome back long forgotten friends. Corn on the cob, green garlic, all manner of flowers, squash blossoms, and stone fruit beginning with plums, pluots, apricots and apriums.

With the abundance of locally grown produce, the high points of my week are visits to the Wednesday Santa Monica and the Sunday Pacific Palisades Farmers' Market.

As a child I avoided contact with vegetables as much as I could. My mother's treatment of produce was ungenerous. String beans were boiled in salted water and then extracted, limp and submissive. Corn and English peas were taken from the freezer and overcooked in the same salted water, their flavor saved only by the large pat of butter that joined them in the serving bowl.

Leaving home, I pursued a different path, exploring the local farmers' markets and experimenting with vegetables I had only heard about but never eaten. One of my chief discoveries was that vegetables, like hamburgers and steaks, benefited from grilling.

Who does not love carrots drizzled with olive oil, seasoned with sea salt and black pepper and cooked on a hot grill? Their carrot-essence acquires a caramelized sweetness that is irresistible. And what about the improvement of artichokes, Japanese eggplant, broccoli, corn, squash, zucchini, and even thin slices of Yukon Gold potatoes similarly coated with seasoned olive oil and placed on the grill?

So powerful are those flavors, I have to restrain myself from grilling every night.

Just about any vegetable can be grilled. Some, like tomatoes and asparagus, cook quickly and require an attentive hand to prevent charring. Others, like corn on the cob, take a bit longer and need to be turned frequently for even cooking. A few, like artichokes, require fifteen-minutes in boiling water before heading to the grill.

Grilling pulls out the essential flavor of each vegetable. Those qualities are enhanced by a simple dredging in olive oil seasoned with sea salt and freshly ground pepper.

Once grilled, the vegetables can be served straight off the grill as a finger-food appetizer, a side dish, or even as an entree. But they can be so much more.

Chopped up, grilled vegetables can fill out a parsley salad. Mixed with couscous they make a savory side dish.

Once you start grilling vegetables, they'll become a secret weapon in your culinary adventures.

Grilled Vegetables

Yield 4 servings
Time 45 minutes

Ingredients

4 large carrots, washed, peeled, cut into slabs 1/4" thick, 2" long
2 broccoli crowns, washed, cut into slabs 1/4" thick, 2" long
1 bunch asparagus, medium sized or thick, washed, white ends trimmed off
1 ear of corn, husks and silks removed, washed
2 tablespoons extra virgin olive oil
1/4 teaspoon sea salt
Pinch of black pepper

Method

Turn the grill on to medium and preheat for 10 minutes.

In a bowl, toss the vegetables and season with the olive oil, sea salt and pepper. Using tongs, put the vegetables on the grill.

Close the cover and cook for 2-3 minutes. Turn and cook another 2-3 minutes, checking frequently to prevent burning. How long each vegetable takes to cook depends on your grill, the vegetable, and the thickness of the slices.

Have a serving plate handy so you have a place to put the cooked pieces when they're ready. Serve hot as a side dish or room temperature as finger-food appetizers.

Grilled Vegetable Chopped Salad

Cut the corn kernels off the cob. Roughly chop the other vegetables. Toss together. Add a bit more olive oil, taste, and adjust seasoning with sea salt and pepper.

Grilled Vegetable and Parsley Salad

With the grilled vegetables as a starting point, the salad can be expanded by adding elements. In this case, parsley.

Ingredients

3 cups grilled vegetables, roughly chopped
1 bunch Italian parsley, washed, most of the stems removed, leaves finely chopped
1/2 cup crumbled feta 
Olive oil
Sea salt and pepper

Method

Mix together the chopped vegetables and parsley. Add more olive oil as needed, taste and adjust seasoning with sea salt and pepper.

Variations

Add 1 avocado, peeled and chopped

Add 10 fresh cherry tomatoes, quartered

Add 1 tablespoon chopped scallions or red onion

Substitute cilantro for parsley

Add 1 hard boiled egg, finely chopped

Couscous Salad with Grilled Vegetables and Parsley

The salad becomes more substantial with the addition of easy-to-make couscous.

Yield 4 servings
Time 20 minutes

Ingredients

1 cup whole wheat couscous
1 1/4 cups water, boiling
Olive oil
Sea salt and pepper

Method

Mix together 1 cup whole wheat couscous, the heated water, and 1 tablespoon olive oil. Stir well, cover with plastic wrap and set aside 10 minutes, then fluff and cover again until needed.

In a bowl, mix together the chopped vegetables, parsley, and prepared couscous. Add a bit more olive oil, taste and adjust seasoning with sea salt and pepper.

Variations

Add 6 grilled mushrooms, roughly chopped

Add 1 fresh avocado, roughly chopped

Add 10 grilled shrimps, roughly chopped

Add 1/4 cup crumbled feta or goat cheese

Monday, May 26, 2008

Corn Goes from Grill to Salad Bowl

When the weather warms up, I happily trade the stove for the barbecue. What a pleasure to be cooking outdoors. The heat blasting off the grill. The trees and sky overhead. I just love it.

We grill a lot of vegetables. Corn is one of our favorites. Besides enjoying corn on the cob, with very little effort the grilled corn makes a terrific salad.

Grilled Corn
Yield 4 servings
Time 20 minutes

4 ears of corn, silks and husks removed, washed
Olive oil
Sea salt and pepper

Drizzle the corn with olive oil, then season with sea salt and pepper. Put on the hot grill. Turn frequently with tongs to avoid burning. Charing adds to the flavor, but just a little bit. Serve hot off the grill by itself or as a side dish.

Grilled Corn Salad
Yield 4 servings
Time 10 minutes

4 ears of corn, grilled
1 bunch Italian parsley, washed, leaves only, finely chopped
1 scallion, washed, ends removed, finely chopped
Olive oil
Sea salt and pepper

Use a sharp knife to remove the kernels. In a bowl mix together the corn, parsley, and scallion. Drizzle with olive oil and season with sea salt and pepper. Toss well and serve at room temperature.

Variations

Use cilantro instead of Italian parsley.

Add sautéed onions and garlic, lightly browned in olive oil.

Add bell peppers, red, yellow, or green--raw is good; if grilled, remove the skins--chopped the same size as the corn kernels.

Pickle Me Up! It's Thanksgiving!

Pickles are delicious anytime of the year. For Thanksgiving they are especially good. Their crunch and acidity counterbalances the delicious...